For Each File Handler
Using Ouvvi to process Files in a Directory one by one.
We thought we would put an update out that a new handler has been added to Ouvvi's list of steps for v3.0.432: For Each File.
This new handler will run an Ouvvi project for each file in a directory, waiting for each file to be processed before moving onto the next one. If there are no files in the directory it will complete without error, allowing for this to be run on a schedule.
How it works
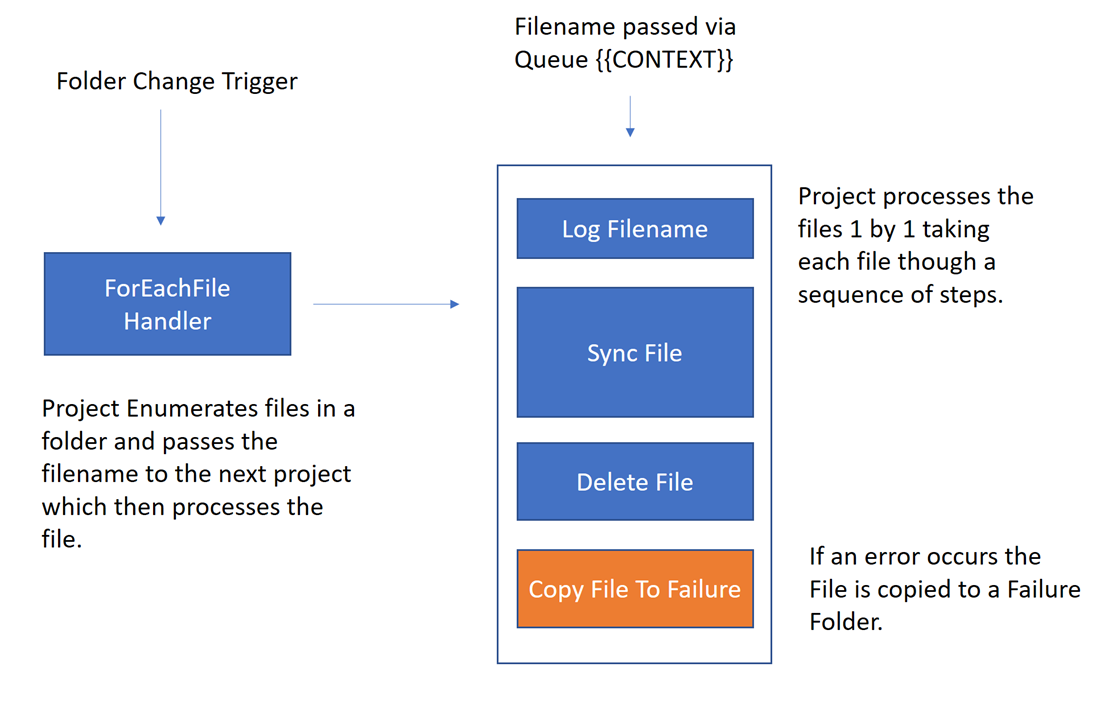
The ForEach Handler project identifies the files in a directory and passes the file name to the queue value {{CONTEXT}} in Ouvvi. The context can be either the Full Path, File Name or a Relative Path.
This is then passed onto the project that will process the file, in this case a sync project that has multiple steps. The first step writes a message of the file path to the log, we then have a Data Sync Project that syncs the file between two sources. The next step is to delete the file if it has been successful using the delete file handler available in Ouvvi. If an error occurs and the file is not synced then the file is copied to a Failure folder.
Once the first file has been processed and the sync project has run through completely, the ForEach Handler will then extract the data for the next file in the directory. This process continues until all of the files in the directory have been processed.
Setting Up
The Scenario: You have a folder that is updated on a regular basis, the files added need to be incorporated into a SQL table. The files need to be deleted from the directory after they are added to the SQL table. If the sync fails then the file should be stored in a failures folder.
Set the User Settings
Ouvvi has the capability to define various user settings which can then be called upon with a user defined name.
In this example we will be using a specific file location repeatedly, therefore it will be easiest to define the path to the directory in the user settings with a name of 'FileLocation'.
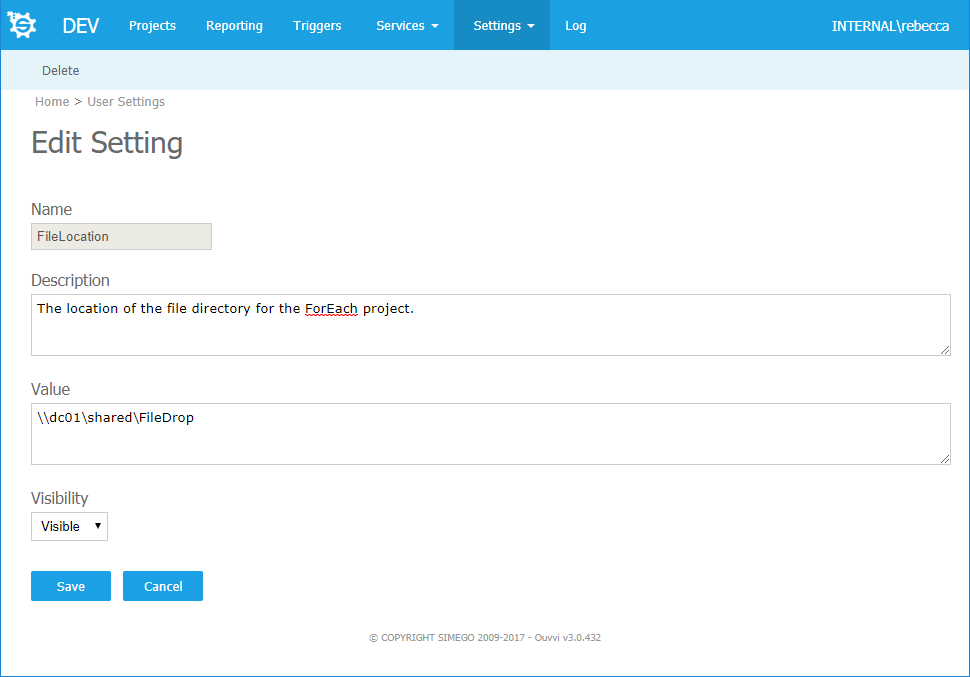
This then means we can use the runtime expansion{{FileLocation}} rather than typing the path each time it is needed.
Create the Processing Project
The For Each File handler will feed into a defined project, to begin we need to create this project. In this example the project is called 'Sync Files'. The setting up of the steps is explained below:
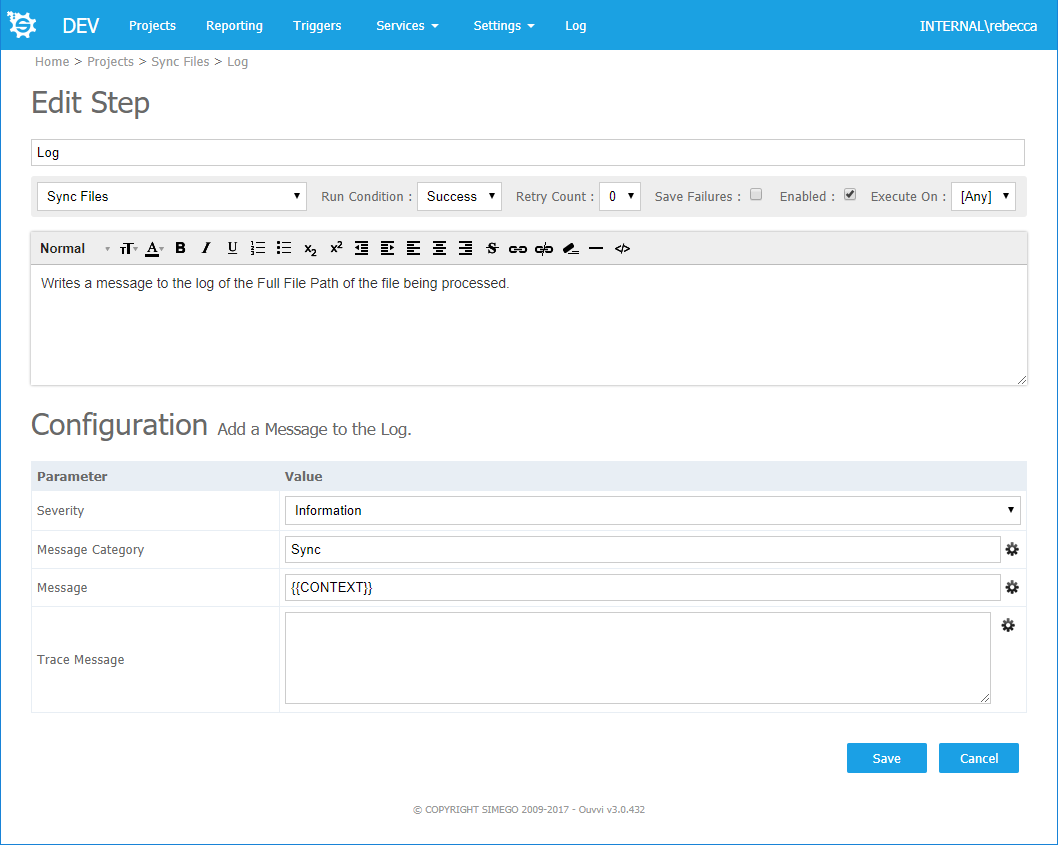
1. Log Message
Using a Log Entry step we can add a message to the log to show the file path of the file that to be processed.
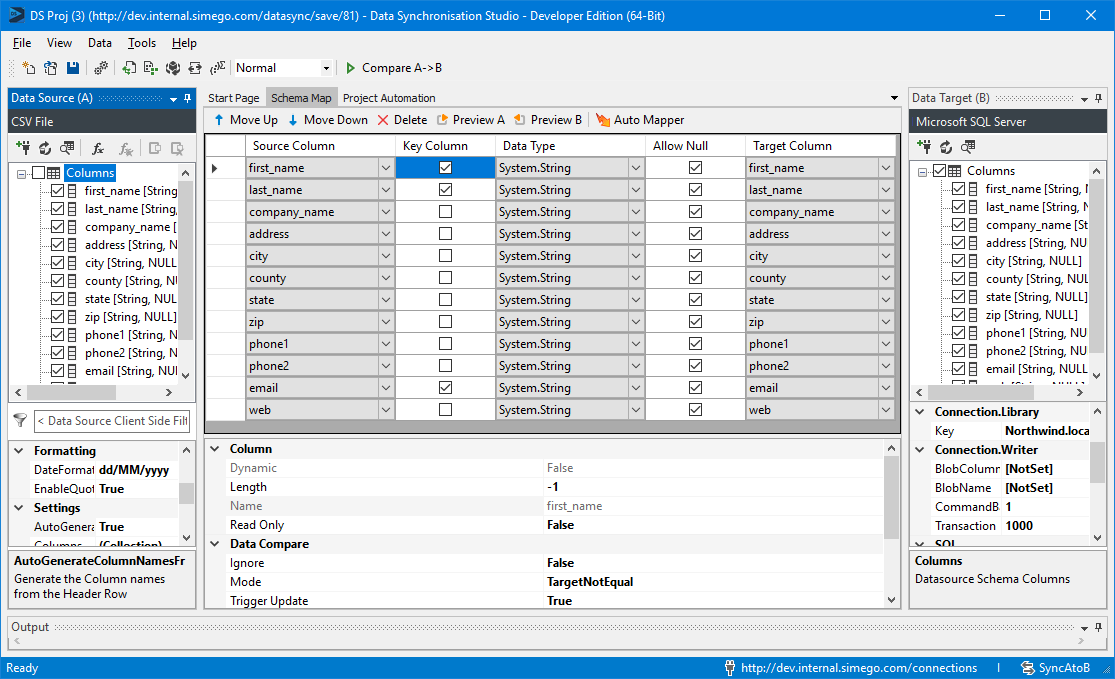
2. Data Sync Project
To synchronise the file to our chosen source we will need to add a Data Sync Project step. In this example we are going to use CSV files that will be synced to a SQL Table.
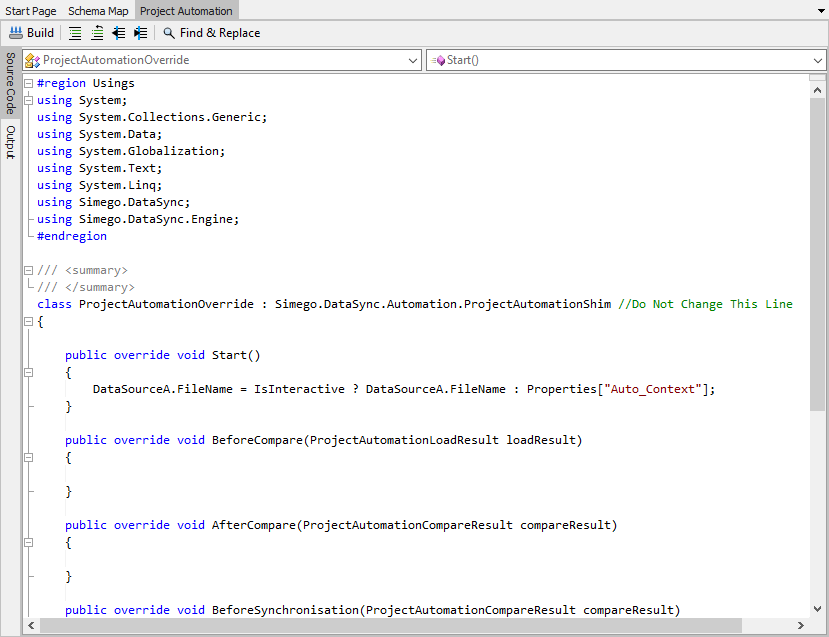
For this to work with the ForEach handler Ouvvi will update the project at runtime with the value of {{CONTEXT}} to the project properties.
At runtime Ouvvi will inject this {{CONTEXT}} value into the Data Sync Project Properties property named Auto_Context we need to use Project Automation to get this value and update the source CSV Connection Filename to that it will process the correct file.
During Design Time of our project the value of Auto_Context is empty and this will break our project so we need to only set the Filename property when we are running under Ouvvi. We can do this with the IsInteractive project property that tells us if were running in design mode or not.
In Project Automation we simply set the FileName property of the Source Connection to the Path that is supplied via the Auto_Context project property value.
public override void Start()
{
	DataSourceA.FileName = IsInteractive ? DataSourceA.FileName : Properties["Auto_Context"];
}
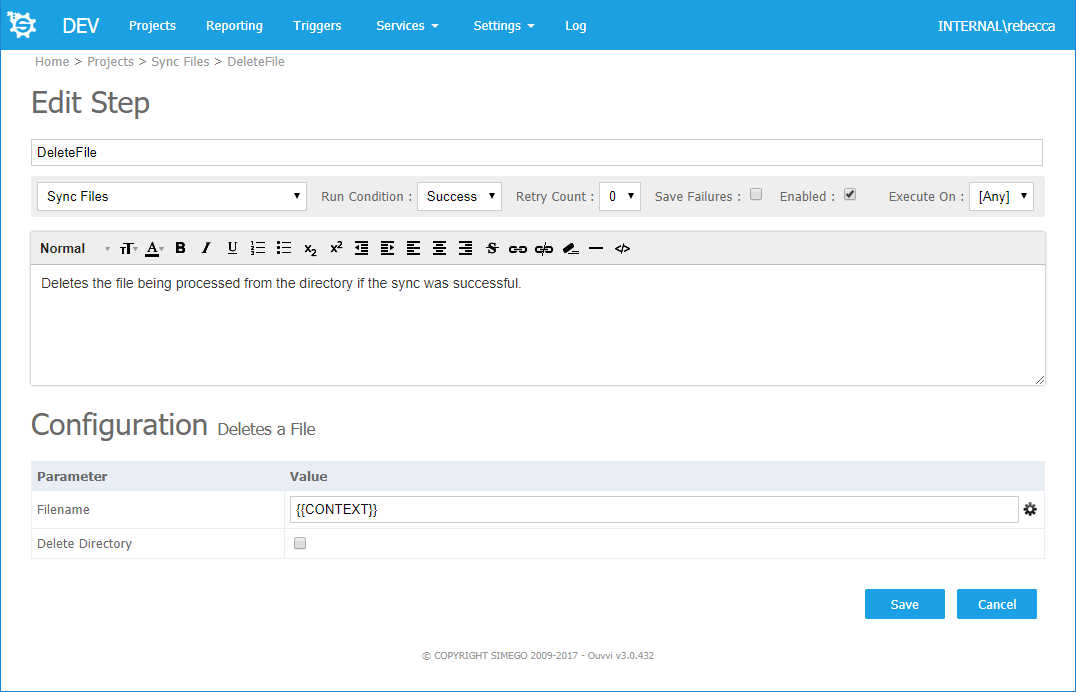
3. Delete the File
To delete the file after processing we will add a Delete File Step that calls {{Context}}.
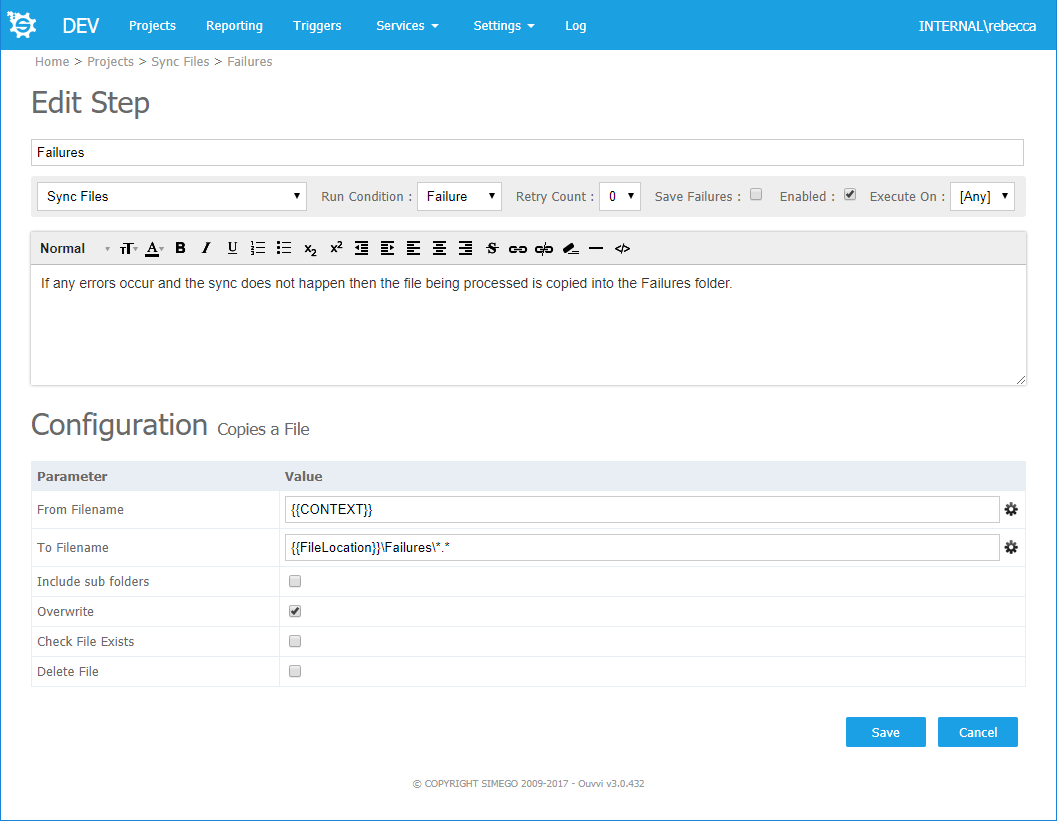
4. Failure Folder
The Failures can be moved to a failure folder by using the File Copy Step. The configuration for this can be seen below:
5. Test Run
If everything has been set up correctly when we try a test run of the project the log instance will look something like this:
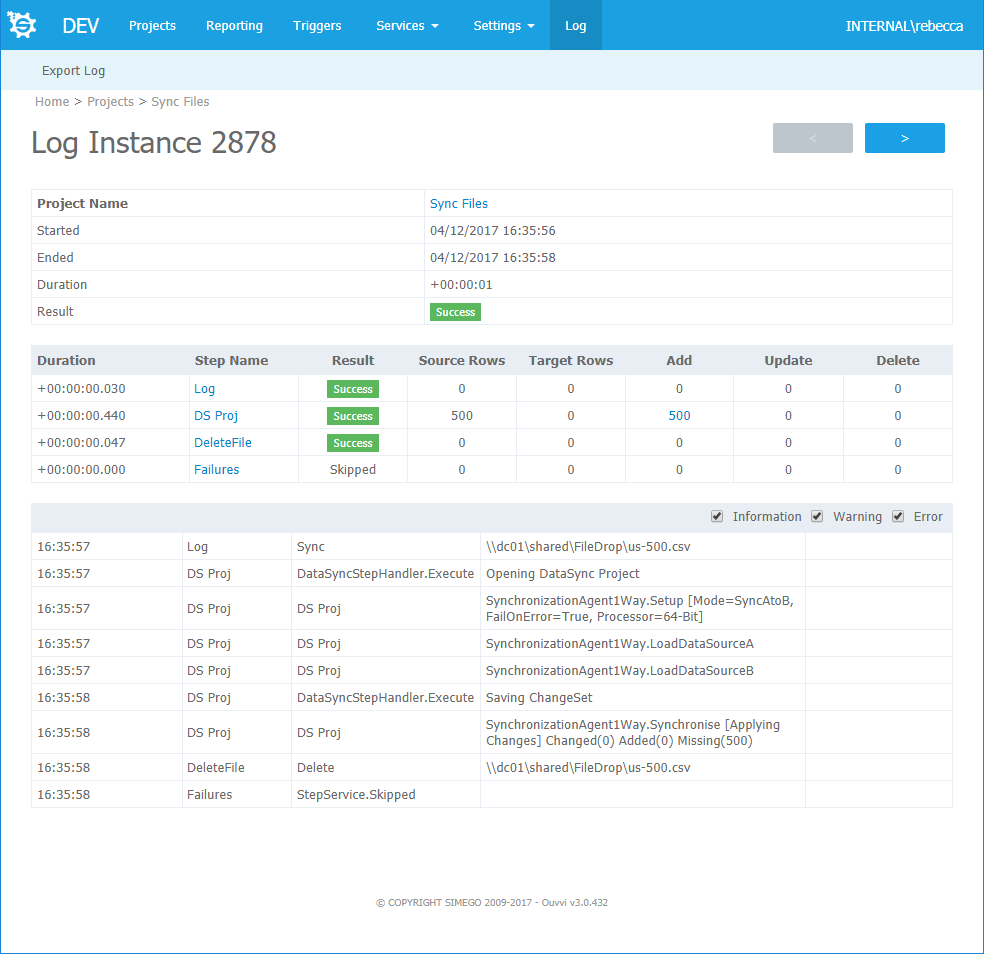
The log step writes the file path to the log, the data sync project processes the file (500 additions), the delete step deletes the file from the directory and the failures step is skipped as the project did not fail.
Configure the ForEach Project
For Ouvvi to gather the context value for each file in the directory we need to configure the ForEach Project. This project will look into the file directory defined by the user and will pass the value of context (Full Path, File Name or Relative Path) onto the processing project we configured earlier.
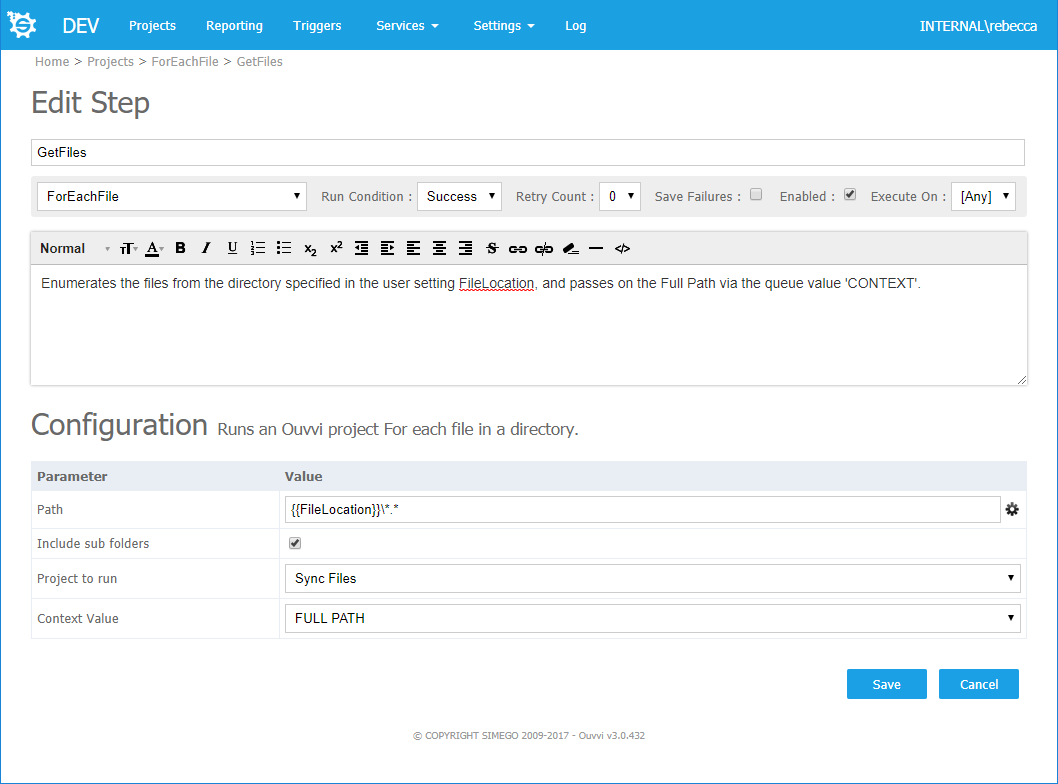
Path
Enter in the user setting for the path to the file directory, or manually enter the path.
Project to Run
Chose from the drop down the project that will process the files, in this example it is 'Sync Files'.
Context Value
Determine the context value by choosing one of the following from the dropdown menu: FULL PATH, RELATIVE PATH or FILENAME. In this example we have been using Full Path.
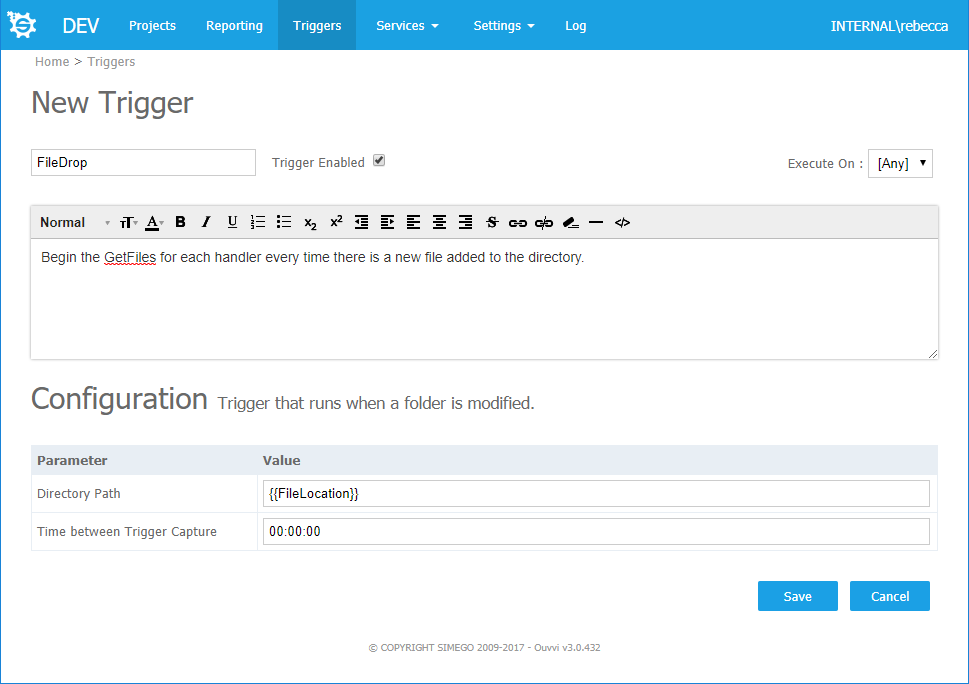
Add a Trigger
To have the project run every time a new file is added to the directory, we can add a Folder Trigger that will detect a change in the modified date of the directory folder. If there is a change detected then the ForEach project will begin.
If you have any questions, contact us at support@simego.com.