Import Email Messages to a SharePoint Document Library
Data Sync makes it possible to get emails from exchange into SharePoint in a few simple steps. The following page discusses how you can set up the Data Sync project and then covers a few options available to schedule the project to run.

Requirements
Before getting started you will need to ensure that you have the following:
- Windows 10 or Windows Server
- Downloaded & Installed Data Synchronisation Studio
- Have installed Ouvvi Automation Server
- Have a Document Library created in SharePoint Online
- Have an Exchange Server
If you do not have Data Synchronisation Studio you can get a free evaluation edition. If you are on a trial and would like to test Ouvvi please send us an email and we can get you started.
Create the Project in Ouvvi
To get started browse to your Ouvvi site and create a new project to hold your steps. If you have not yet setup Ouvvi please see our training pages to learn how to get up and running.
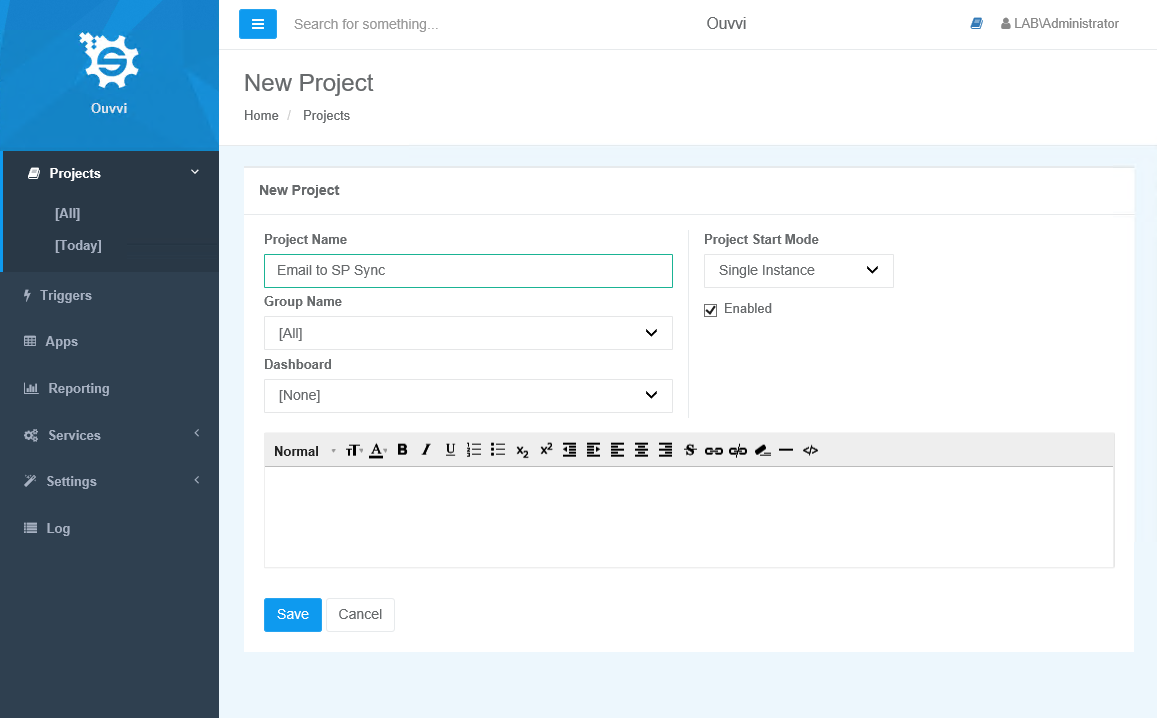
In this example we are creating a project that will synchronise PO Request emails into a document library in SharePoint Online. For this we are going to make use of Data Sync so we need to add a Data Sync step to our project.
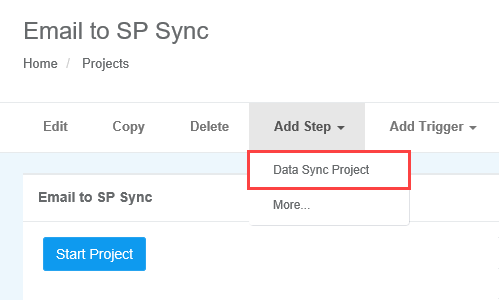
To do this click onto Add Step and select Data Sync Project from the list.
Enter in a name for the step and type in a description to let others know what the project is doing.
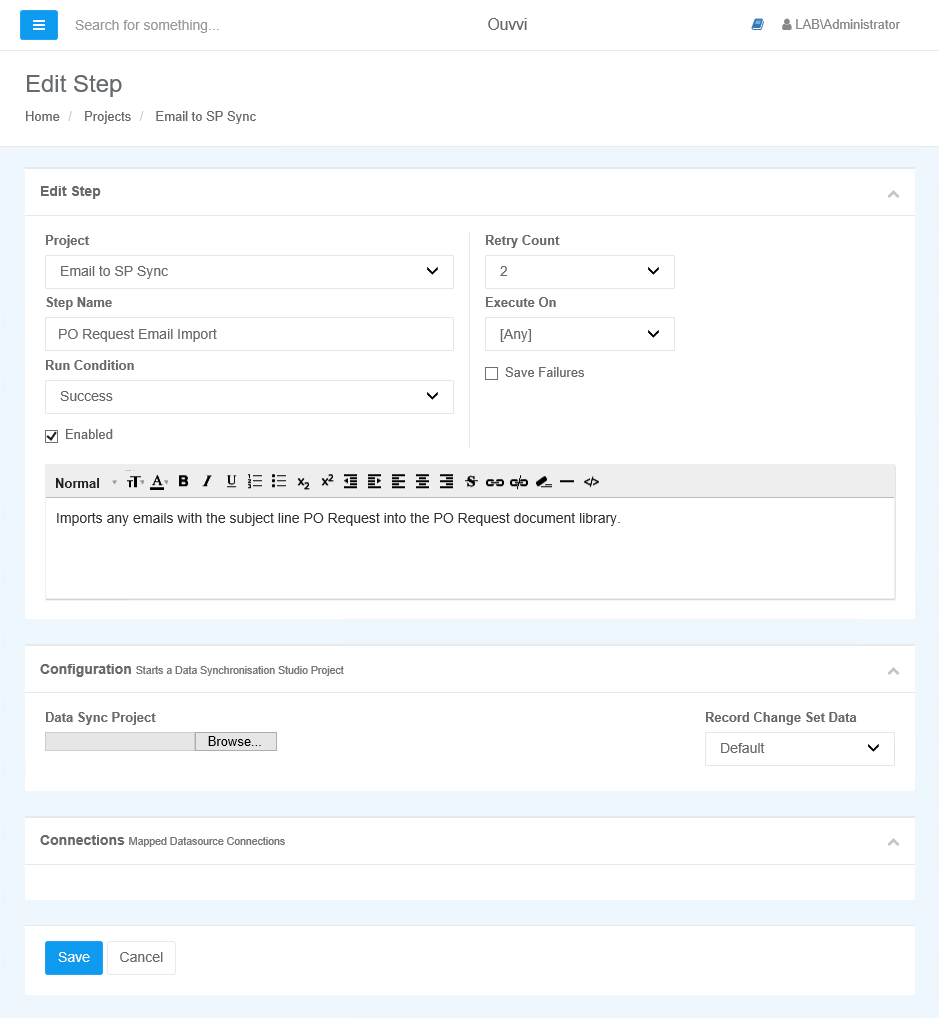
You are now ready to configure the Data Sync step to do the synchronisation.
Connect to your Exchange
Open the project in Data Sync from Ouvvi by clicking onto the Open Project button.

Once Data Sync has opened click Connect Datasource in the source window (Data Source A) to open the connection window. Go to Microsoft Exchange Server > Email and then enter in the details you need to connect.
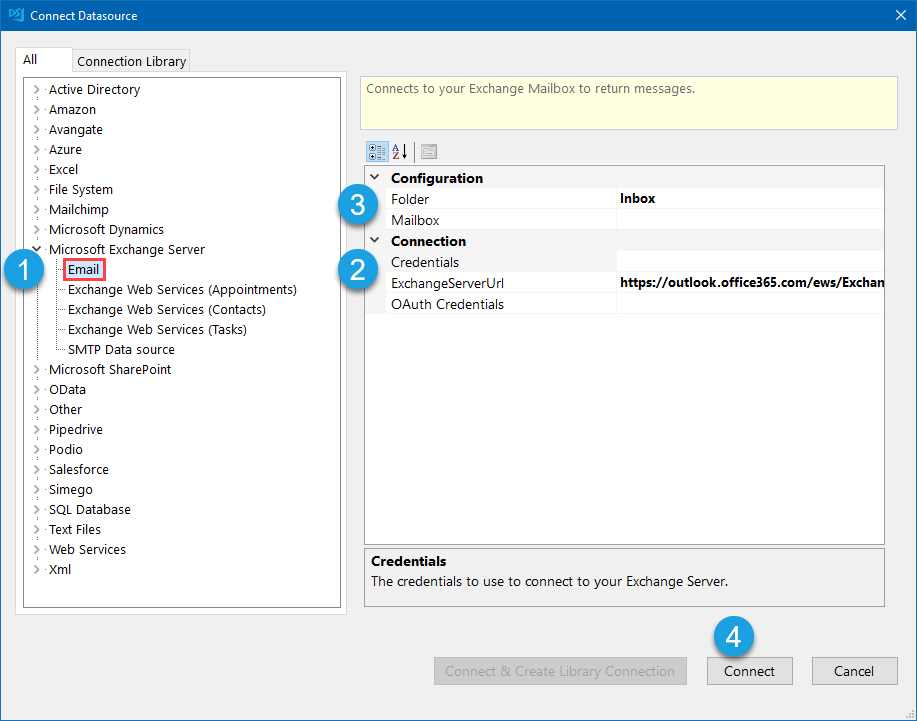
If your Exchange server still has basic authentication enabled you can connect using your username and password by clicking onto the ellipsis (...) in the Credentials field.
If your account uses MFA, you will need to use an App Password.
If basic authentication is disabled (it is being deprecated by Microsoft in 2022) then you will need to use OAuth to connect. The full details on how to connect to exchange with OAuth can be seen on our documentation page.
You can specify between connecting to the inbox or the sent items of your mailbox. You can also specify the mailbox name to return the emails from, if you leave this blank it will use the default mailbox.
Click onto Connect to connect to your Exchange.
Filter the Emails Returned
By default, once you have connected to Exchange, all the emails within your inbox will be returned. Usually you only want to return emails that meet a specific criteria. For this example we are looking for any emails relating to PO Requests.
There are a couple of filters built into the Exchange connector. You can choose between filter by Category, From, ReceivedDateTime, Subject, and To. Alternatively you can build out a custom filter using the filter box in the source window.
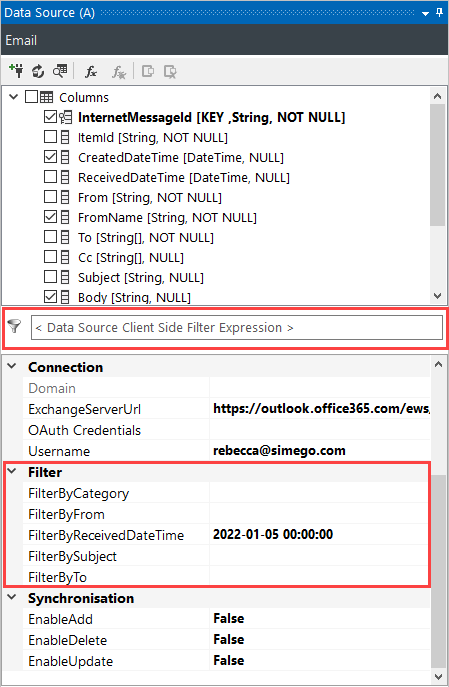
For this example we are filtering by subject for "PO Request".

If we click onto the Preview button this returns all the emails with PO Request in the subject line found within the mailbox.

Connect to SharePoint
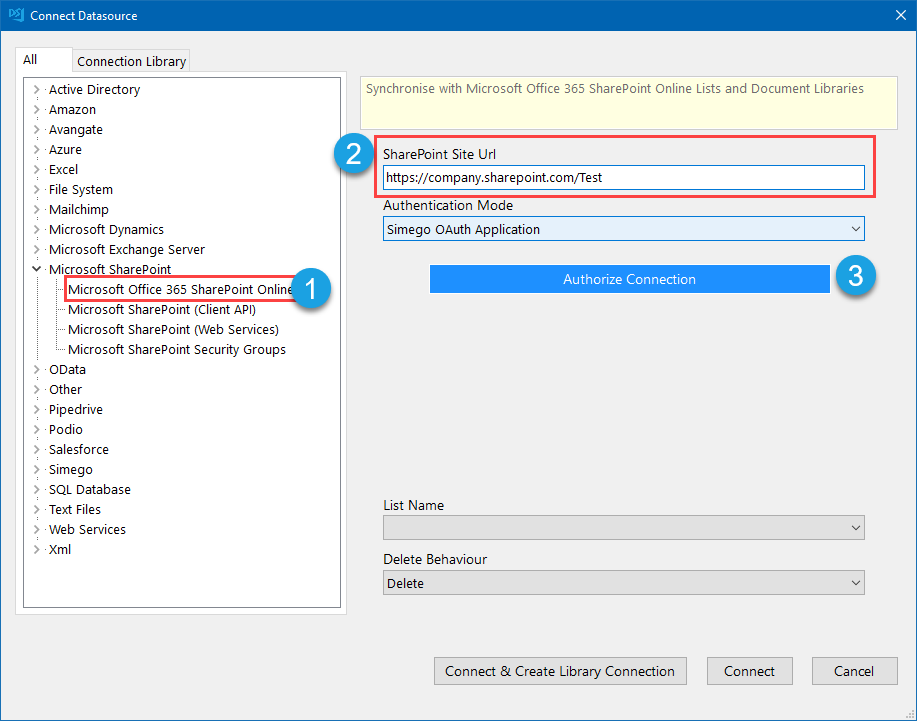
In the Target Window (Data Source B) click onto the Connect Datasource link to open the connection Window. Then locate SharePoint and select the SharePoint Online provider.
Here we need to enter in the URL to the SharePoint site that our list is located in. In this example the list is found in a subsite called Test, so our URL will look similar to: https://company.sharepoint.com/Test.
- To connect to the Root site the URL would look similar to:
https://company.sharepoint.com - To connect to a subsite of a subsite the URL would look similar to:
https://company.sharepoint.com/subsite/subsite2
Click onto the Authorize Connection button and follow the on screen instructions sign in to SharePoint and authorise the connection. The full detailed connection details can be seen here.
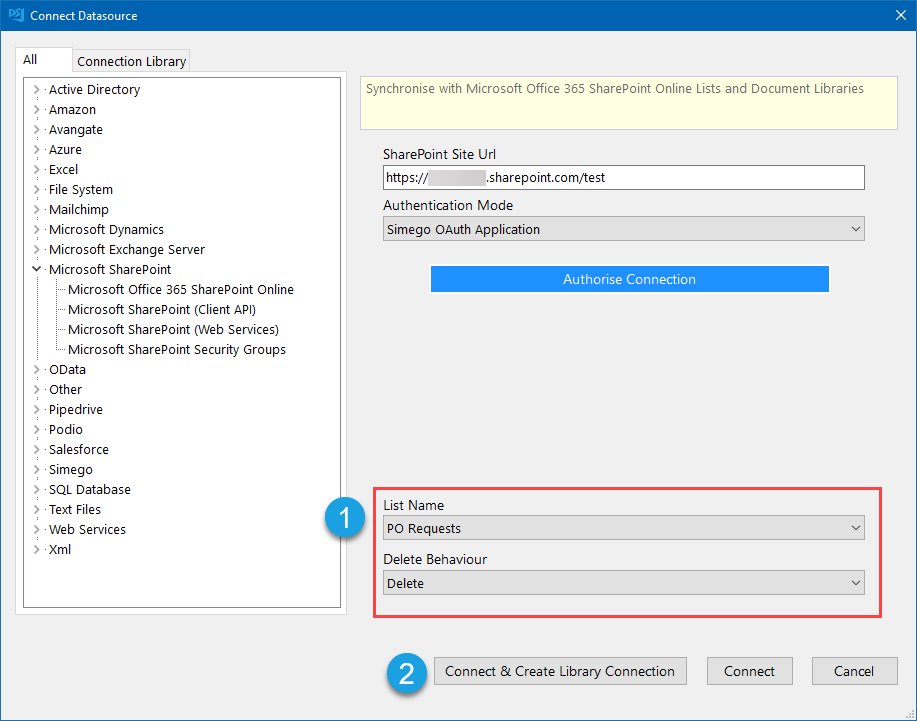
Now you can select your list from the dropdown list and set the delete behaviour.
We recommend saving the connection to the connection library so that future projects can be quickly set up, to do this click onto Connect and Create Library Connection and enter in a name for the connection. This will add a connection to your SharePoint site/sub-site in the connection library so that you can quickly access all the lists and libraries in the future.
Configure the Schema Map
You now need to add the columns you want to the schema map. Do this either by dragging the column into the schema map or checking the checkbox.
Map the source columns to their corresponding field in SharePoint and make sure to select a key column. The key column should be unique to each message and be possible to identify each message separately. In this example we use InternetMessageId which is a GUID and unique to each message.
We only need a minimal map for this to work, however you can extend your SharePoint library with any additional columns if you want to capture more information.

Compare and Preview the Results
Now click onto the Compare A > B button in the toolbar menu to compare the source data to your SharePoint Document Library. The results will appear in a new tab.
Here you can see if there are any additions, updates or deletions, and you can view the results of each by clicking onto the corresponding row.
Please note that by default deletes are disabled but will still show in the results. To enable them go to the target connection properties and set EnableDelete to True.
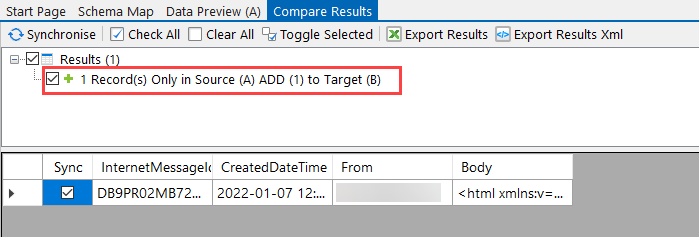
Synchronise
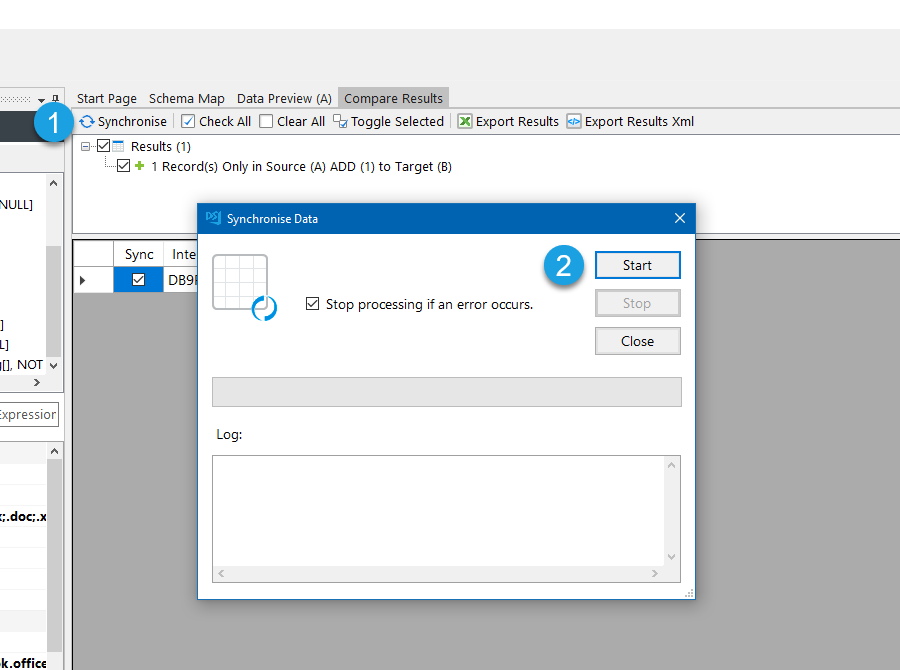
To synchronise the changes click Synchronise and then Start to begin the sync.
Once that has run, you should now be able to view your messages in the document library. You will see that the actual message is stored as a document which can be opened directly from SharePoint.
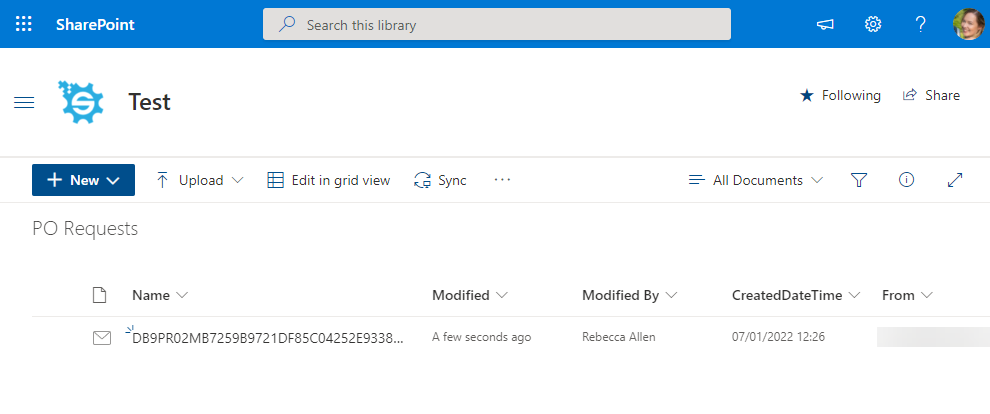
You can now setup an approval workflow to either approve or reject the PO request.
Incremental Sync
Going forward you won't want to return the emails you have already processed, as this can make the project take too long to run. To optimise this we can filter the data source to return the emails received after a certain date. We can then use this value to update the FilterByRecievedDateTime using project automation.
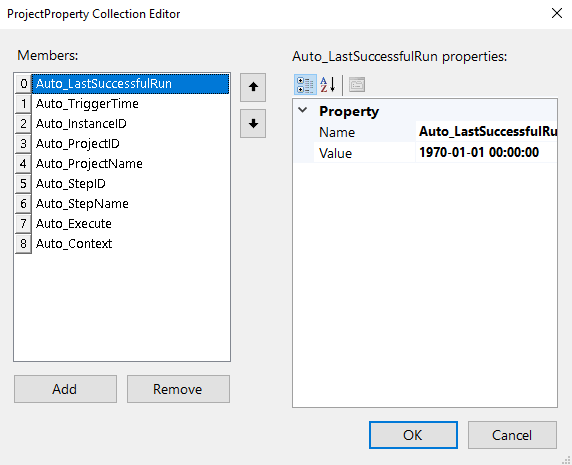
As we are using Ouvvi to schedule and manage our project, it automatically passes a property to the project that we can use to get a date to filter from. This property is Auto_LastSuccessfulRun, and returns the date and time of the time the project last successfully ran.
You can find the list of properties Ouvvi inserts by going to File > Properties and then opening the properties collection.
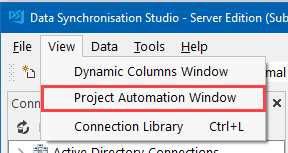
To open project automation go to View > Project Automation, and enable it to access the code editor.
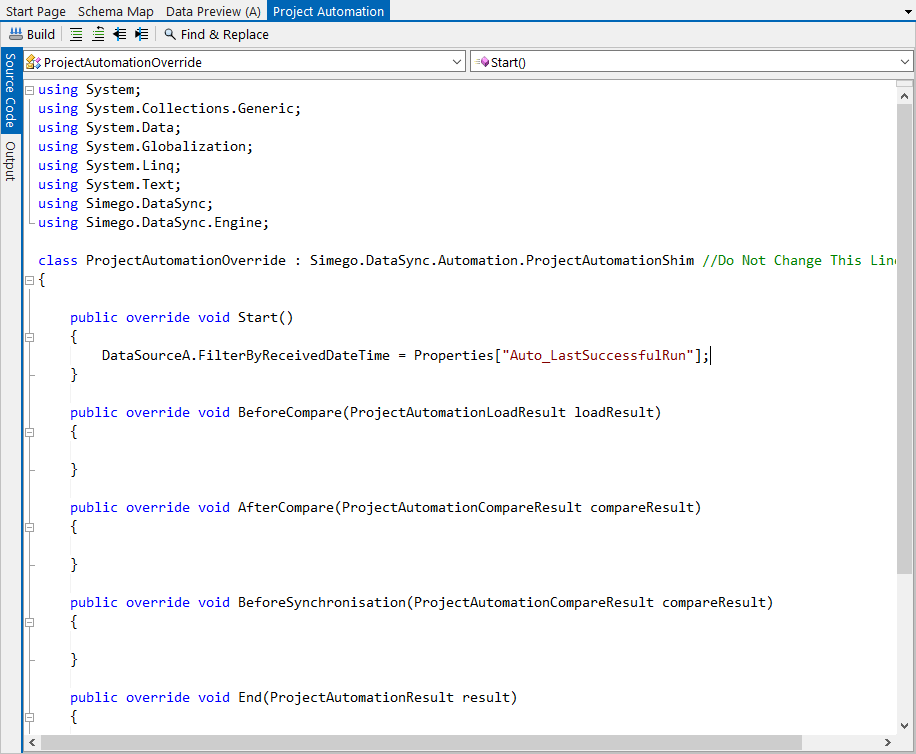
We now just need to enter one line of code to insert the property result as the value in the filter. Enter the following code into the Start() method.
    public override void Start()
    {
     DataSourceA.FilterByReceivedDateTime = Properties["Auto_LastSuccessfulRun"];
    }
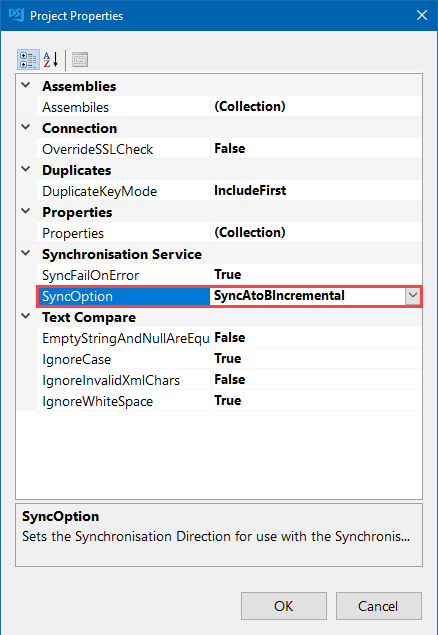
Now we just need to enable incremental sync mode in the project properties. Go to File > Properties > SyncOption and change the value to SyncAtoBIncremental.
Make sure to save the project to Ouvvi by clicking Save. You can now go back to Ouvvi and schedule the project to run.
Automate & Schedule
As the whole synchronisation project is already stored in Ouvvi, we are only a few steps away from having it fully automated on a schedule.
To schedule the project open Ouvvi and navigate back to the main project page. Here you can add additional steps, such as email notifications or other data sync steps, and triggers. Add what you need to fully build out your solution.
On the Ouvvi project page click on to Add Triggers and select a trigger to apply to your project. You can find the full list of available triggers by clicking onto More... > New Trigger.
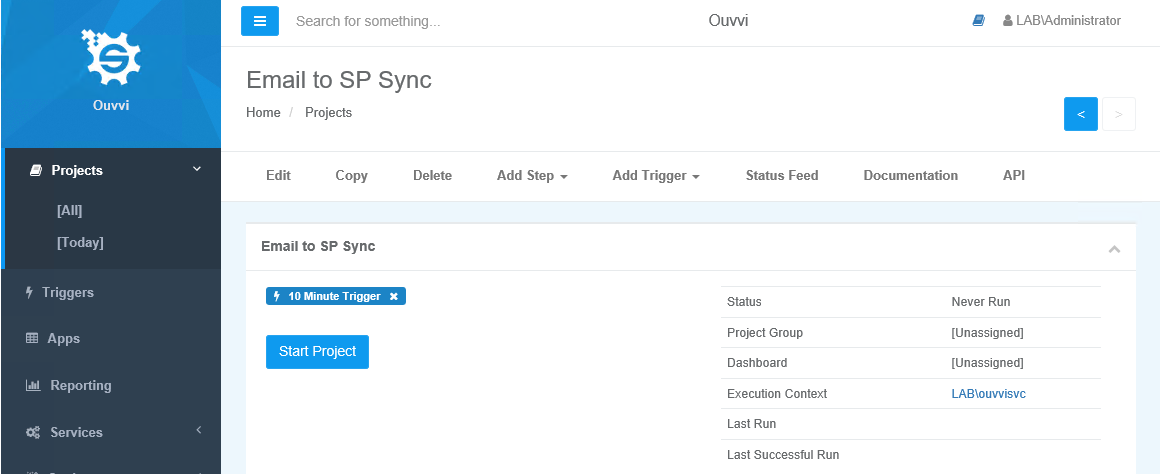
In this example we are using the 10 minute trigger so that the project will run every 10 minutes.
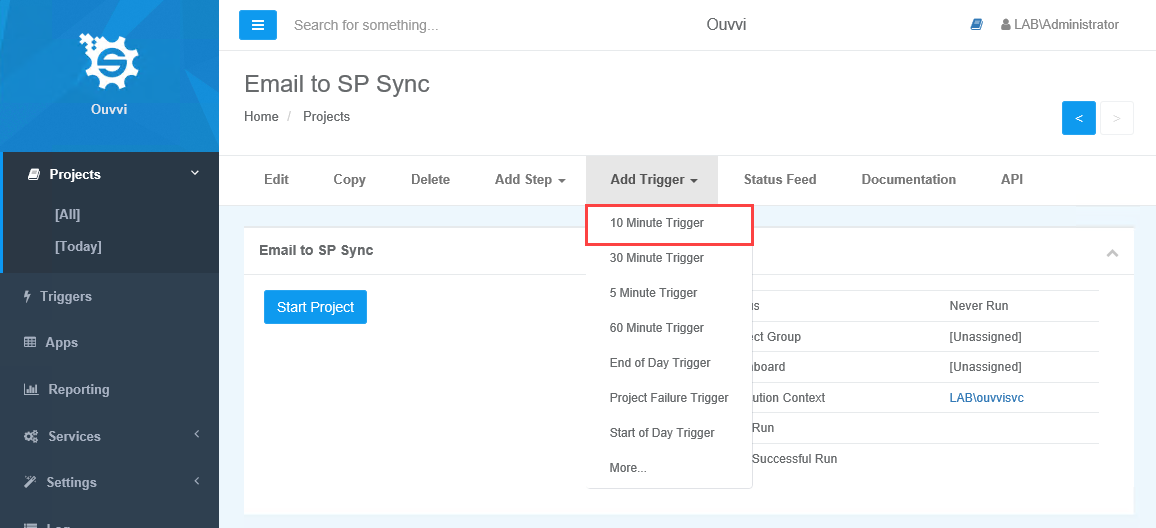
So long as the services are running and a license key is entered into Ouvvi, your project will now run every 10 minutes. Any PO requests that are received to the mailbox will be fed into the Document Library and added to the workflow you have configured.
