Import SQL Table to a SharePoint List
How to use Data Sync to easily Import SQL Table to a SharePoint List
In this guide we will show a method to use Data Synchronisation Studio to Import data from a SQL Database to a SharePoint List. You can use this to keep data in SharePoint upto date with data from your SQL Database.
This might be useful if you have data in SQL that you need to share with the business and SharePoint can be used to provide access to this data company wide.
You could use any of the following data sources to import data in to a SharePoint list and keep it updated.
- Microsoft SQL Server
- MySQL Database
- PostgreSQL Database
- Oracle Database
- CSV File
- XML File
- Excel File

Contents
- Begin Setup
- Connect Source to SQL Table
- Connect Target to SharePoint List
3.1 Create SharePoint List
3.2 Connect to an existing SharePoint List - Map Source to Target
- Compare & Synchronise
- Schedule with Windows Task Scheduler
- Additional Configuration
Begin Setup
Before you start you will need the following:
- Windows 10 or Windows Server 2016-2019
- Simego Data Synchronisation Studio
- SQL Database Table, View or SQL
- SharePoint List on SharePoint Online
If you do not have Data Synchronisation Studio you can get a free evaluation edition.
Connect Source to SQL Table
To start we need to connect the source in Data Sync to your SQL Table. In this example we are going to connect to a Microsoft SQL Server database and import the Northwind demo database Products table to a SharePoint List.
Note: The source can actually be anything where we have a connector, in this example we are using a SQL Table but it could equally be a SQL View, SQL Statement, CSV file etc.
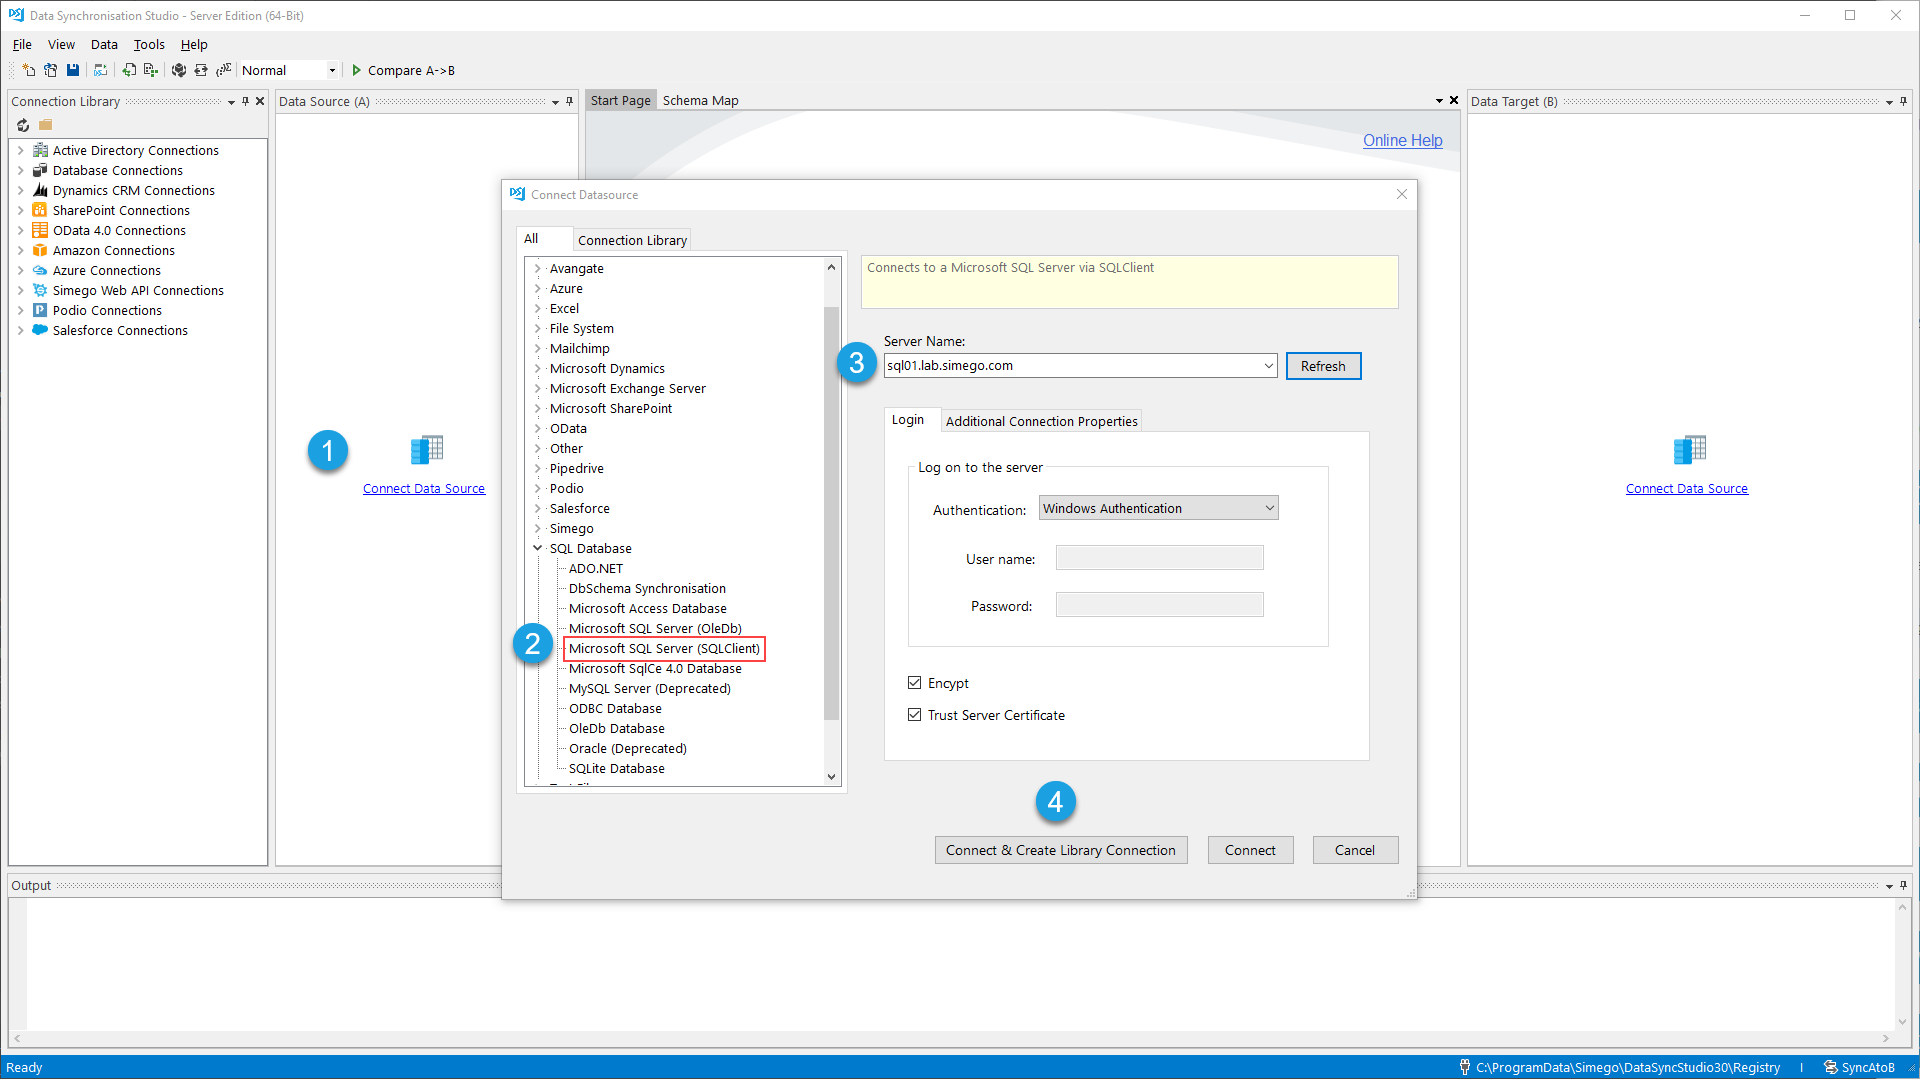
In Data Sync click the Connect DataSource icon on the source to open the Datasource connection window. Then choose the SQL Server (SqlClient) connector under the SQL Database category.
Enter the Server Name choose any credentials in this example we are going to use the current user and then click Connect & Create Library Connection.
By creating a Connection Library connection this allows us to use the same connection for multiple projects to the same database. Later if we need to change the connection configuration we can update the connection library to apply the change to all projects using the same connection.
Now we select the SQL Table to connect to from the SQL object explorer window.

Finally give the connection a name to save it to the library.
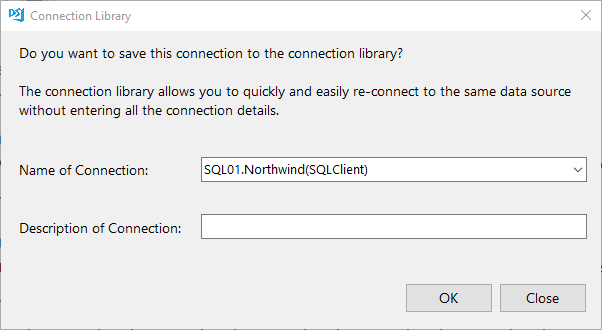
FYI: The connection is to the database so you would require one connection library entry for each database. Do not create connection library connections for each SQL Table.
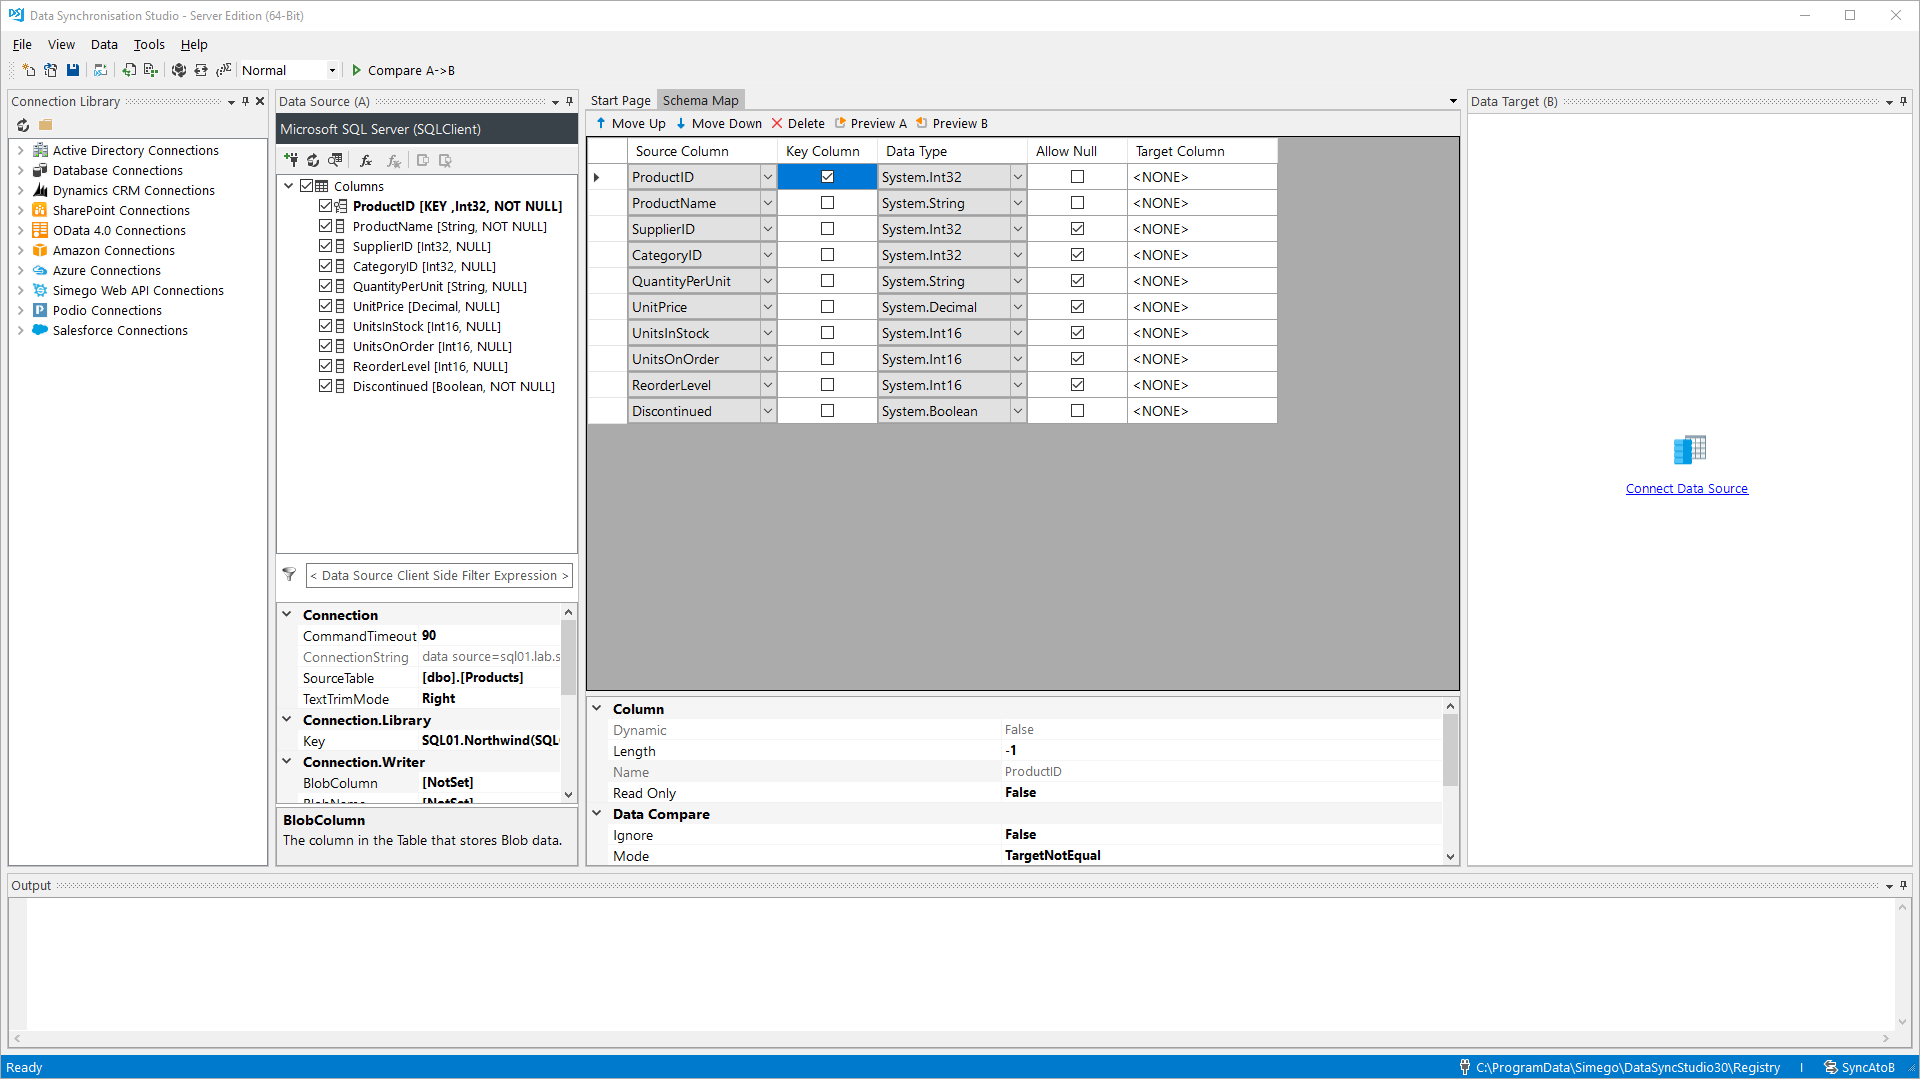
Once your connected to the SQL Table, Data Sync will load the SQL Table data schema into the source connection and create a default schema map.
Connect Target to SharePoint List
Data Sync can either connect to an existing SharePoint list or you can automatically create a new SharePoint list from the columns in the schema map.
There is a requirement that you must have saved a connection to your SharePoint Site in the Connection Library in order to use this feature. If you have already saved your connection to SharePoint then you can follow the steps below to create a new list.
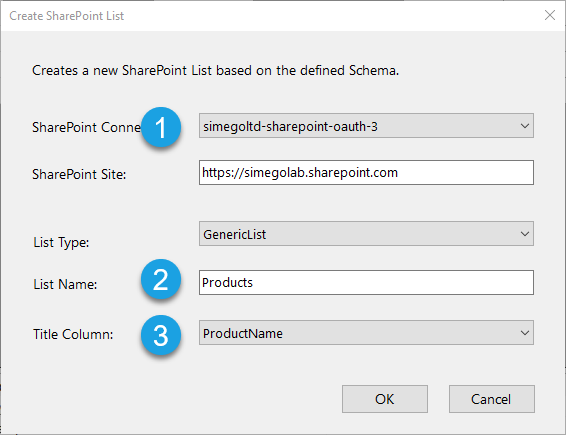
Create SharePoint List
If you want to create a SharePoint list from your Table Schema. First ensure that the Schema Map includes the columns you want to create in SharePoint. The Key column you select here is what defines the unique records typically this will be the table Primary Key.
Note: The SharePoint ID column is read-only and therefore cannot be provided a value from your SQL source. You should therefore not use a column with the name ID as the Key column. If your table Primary Key is called ID then you should manually add a new column say ItemID to the List in SharePoint and map ID to this new column instead.
For each of your String columns in the Schema Map you should ensure that the Length property is set appropriately set any -1 values to an appropriate length for your data. Values above 255 will be created as Note columns in SharePoint.
Next go to Tools->Create SharePoint List to create the List in SharePoint. Choose your Connection Library connection from the drop down and give your new List a name. Then choose a column to be used as the Title column in your new SharePoint List this column will be clickable in SharePoint.
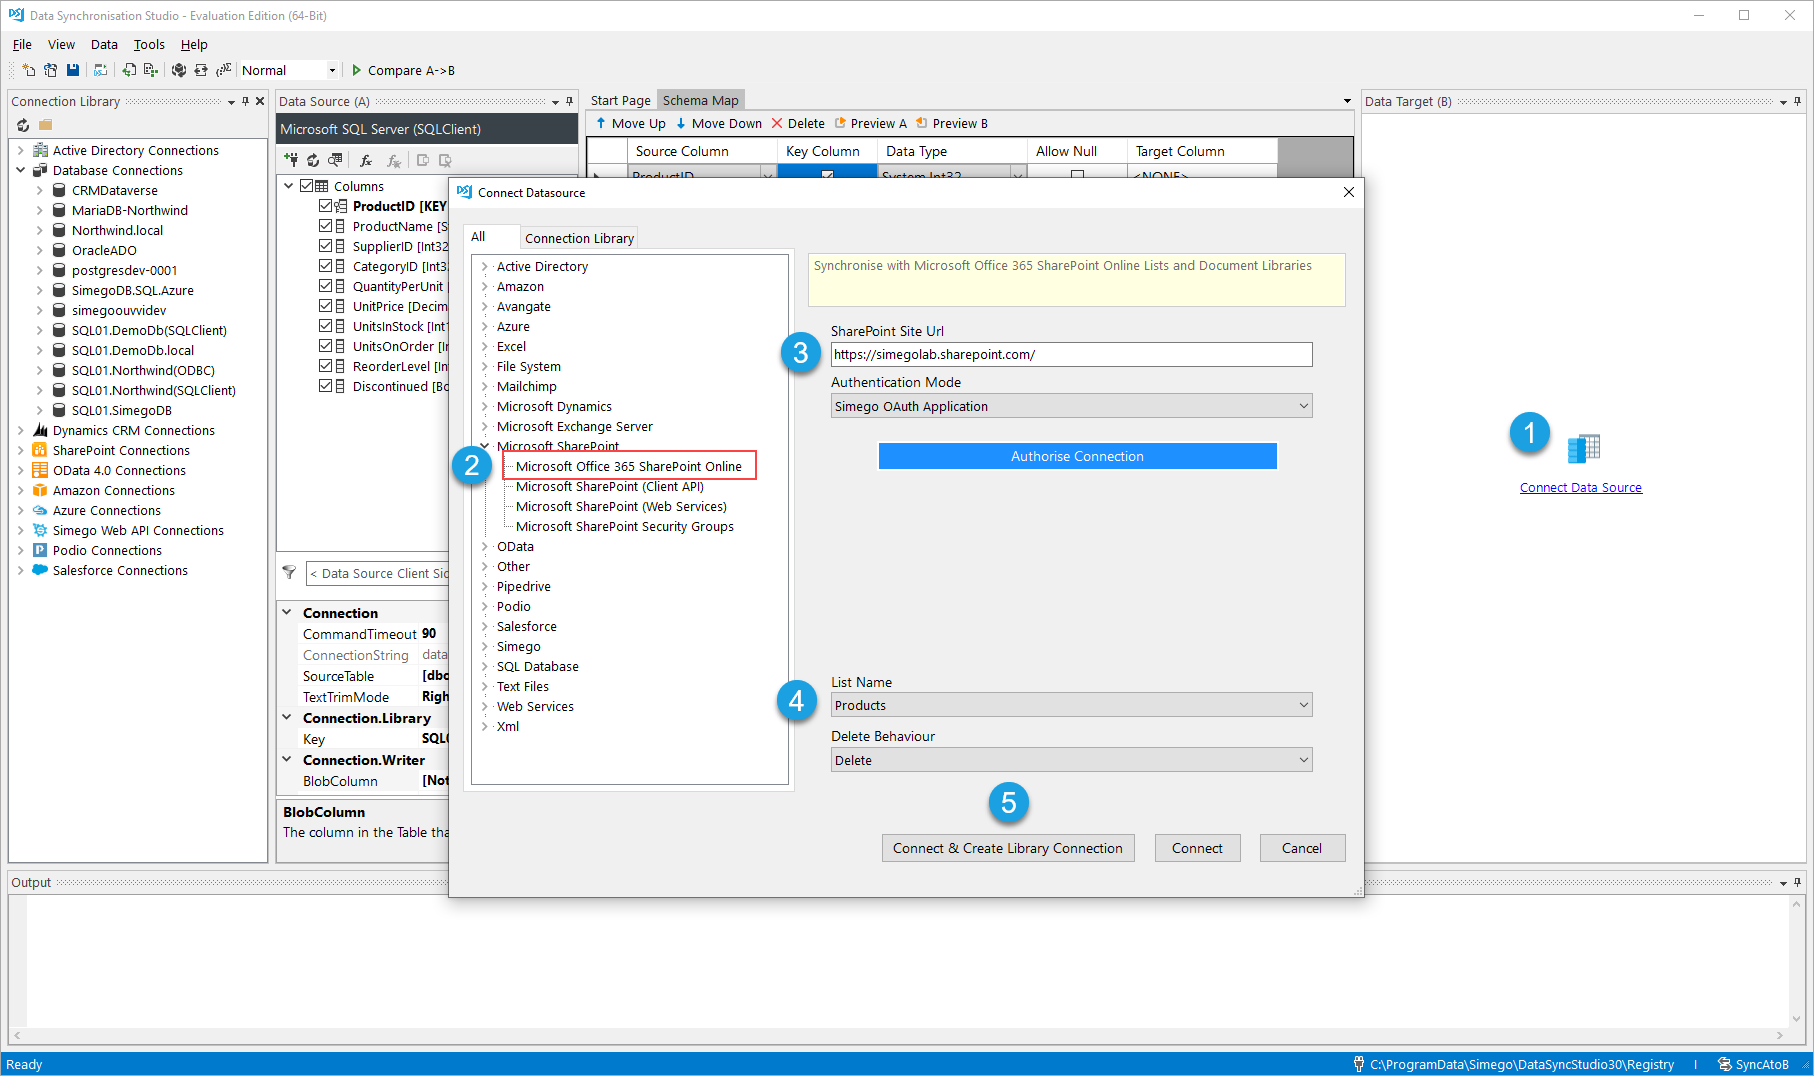
Connect to an existing SharePoint List
Data Sync can connect to SharePoint Online or an OnPremise SharePoint Document Library. The following details are for a connection to SharePoint Online.
For SharePoint Online you can connect either with Modern Authentication (Oauth2) or your Azure AD credentials if your organization still supports it.
FYI: In the future the only connection method for SharePoint Online will be OAuth2. Microsoft is disabling other authentication methods throughout 2022.
In Data Sync click the Connect DataSource icon on the source to open the Datasource connection window. Then choose the SharePoint Online connector under the Microsoft SharePoint category.
Enter the URL to your SharePoint Site this the URL to the root of your site. Examples of the URL are listed below.
https://company.sharepoint.com/https://company.sharepoint.com/subsitehttps://company.sharepoint.com/subsite/subsite2
Choose the Authentication Method to connect to your SharePoint Site. Choosing the default Simego OAuth Application will use a pre-registered multi-tenant Azure AD Oauth2 Application to connect to your SharePoint Online instance.
You can learn more about supported authentication methods in our documentation. Click the Authorize Connection button, this will open your default browser and ask you to sign in to Azure AD and grant access to allow Data Sync to connect to your SharePoint instance.
Once the Authorization is complete go back to Data Sync and choose your SharePoint List from the List and click Connect & Create Library Connection then give the connection a name and click OK.
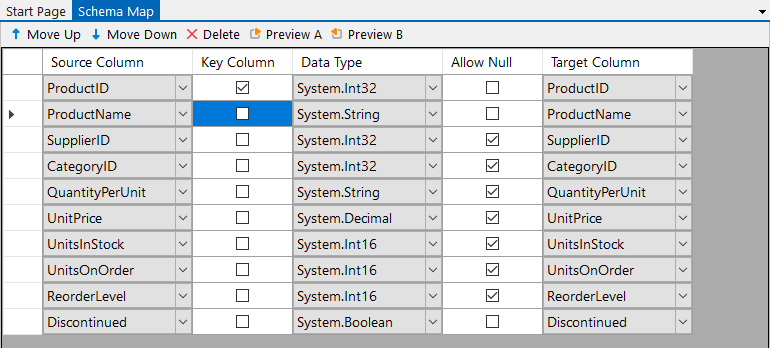
Map Source to Target
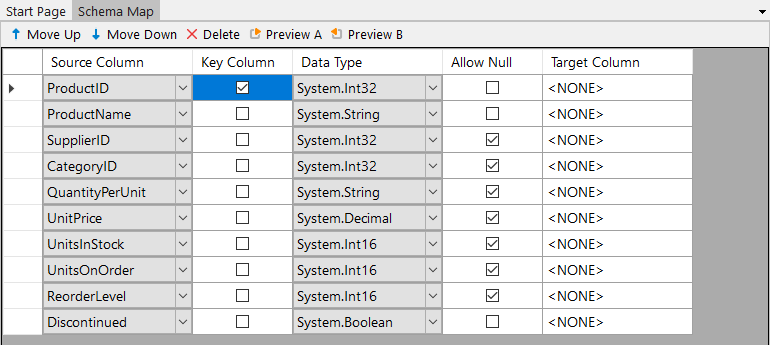
We now need to configure the schema mapping, This mapping describes the relationship between the source columns and the target columns along with a data type conversion and key column selection.
If you used Data Sync to create the list then this default mapping will be created for you.
The Key column is used to identity each row and therefore must be a unique value typically the table Primary Key. The Data Type is used to allow for basic type conversion, typically this will be the type of the target column. This allows you to apply simple Data Type conversion like converting strings to numbers or boolean to a string etc.
Compare & Synchronise
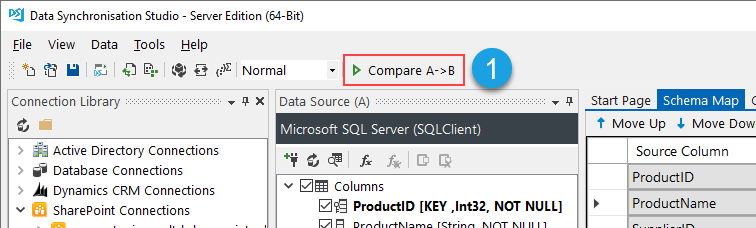
Next we use Data Sync to load the rows from your SQL Table and the List Items in the SharePoint List and compare these to work out which rows need to be ADDED, UPDATED or DELETED so that the SharePoint List matches your SQL Table.
FYI: Delete operations are always disabled by default on new Data Sync projects to enable Delete you need to set the EnableDelete property in the target connection to true.
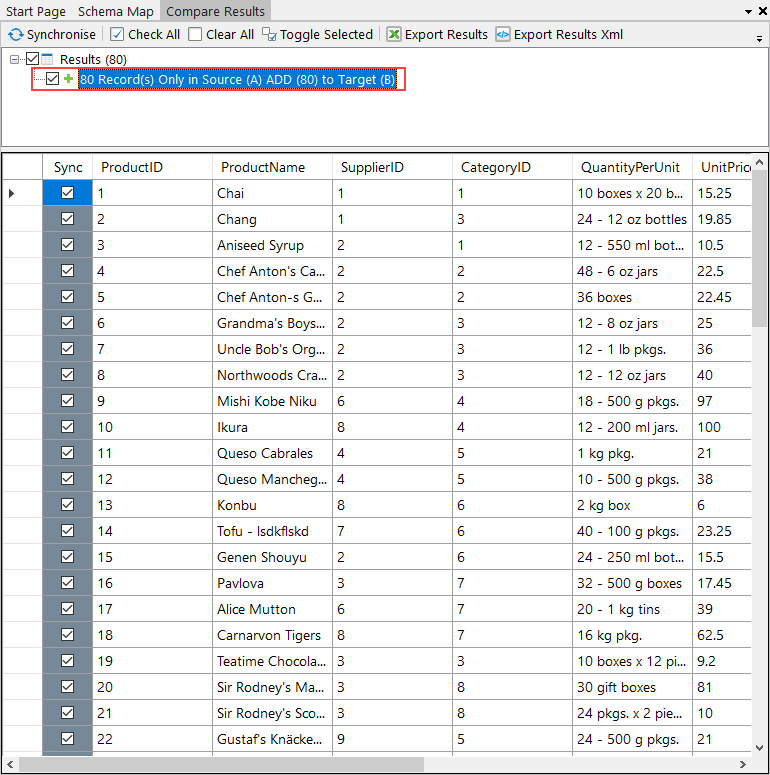
To start the synchronisation process click the Compare A->B button on the main toolbar. This will start the process to load the rows from SQL and items from SharePoint. At this point only the data is loaded and compared to create the changeset, no records would have been written at this point.
We can now review the changes that are to be made before running the copy operation to copy the rows from SQL to SharePoint.
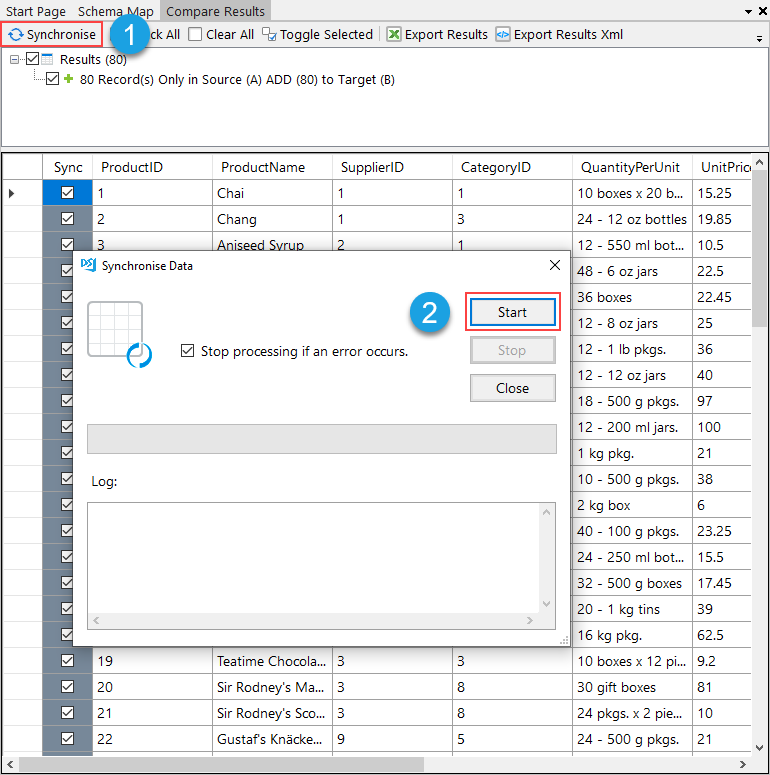
Clicking on the 80 Record(s) Only in Source (A) ADD (80) to Target (B) row in the changeset shows us the rows to be ADDED to the Sharepoint List. We can the review this and once we happy to continue click the Synchronise button to start the copy process.
Click the Synchronise and then Start button to start the actual synchronisation.
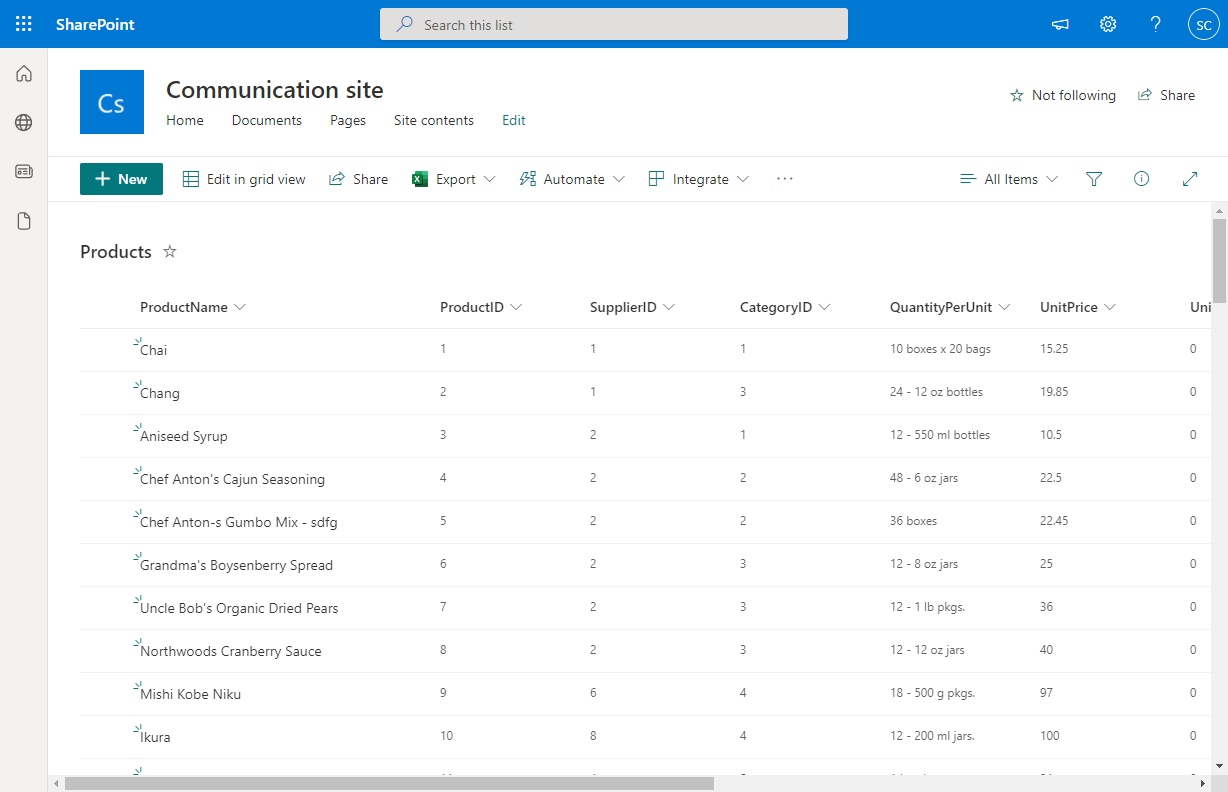
This completes the synchronisation, if you then look in SharePoint you will see that your SQL Table as been copied.
You can then go and add or edit records in your SQL Table. When you then compare and synchronise again you will see that only those records which were changed in SQL are copied to SharePoint.
Schedule with Windows Task Scheduler
Now that your project is configured you can save it and then schedule it to run via the Data Sync Run Tool and Windows Task Scheduler.
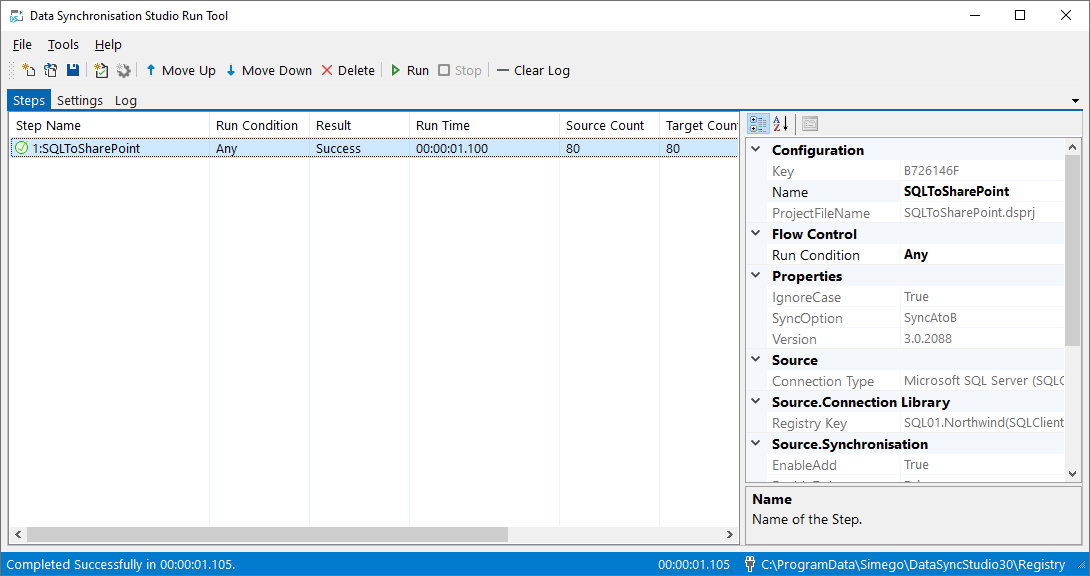
Run via RunTool
The Run Tool is an application used with Data Sync to build out your Data Processing pipelines. Each step in the pipeline is executed in sequence and you can use flow control status to control which steps are executed. See our Run Tool Documentation to find out more.
From your project in Data Sync go to Tools->Open in RunTool this will then open your project in the Run Tool. From here you can click the Run button to test that the project runs successfully.
To configure Windows Task Scheduler to execute your Run Tool project please see our guide Schedule a Run Tool Project with Windows Task Scheduler
Run via Commandline
You can also run your project via the commandline by passing the path to the Data Sync project file to the Simego.DataSync.Run.exe program like this.
%DATASYNCINSTALLPATH%\Simego.DataSync.Run.exe -execute "D:\DSProjects\myproject.dsprj"
Additional Configuration
Use SQL as a Source
You can use your own SQL as the source, to do this enter your SQL into the SQLCommand property on the source connection.
Filter the source SQL Table
You can filter rows on the source by specifying a SQL WHERE statement in the CommandWhere property.
Update SharePoint Document Library
If you want to update metadata on a Document Library rather than a SharePoint List. Connect to the Document Library as the target and set the DocumentLibraryUpdateBehaviour to MetadataOnly this way Data Sync doesn't try to upload a new document.