The New and Improved Run Tool
Whilst trying to build a new version of Data Sync (DS4) we had lots of new ideas and have made some good progress. However we realised that we were making the product more complex and confusing, which is not what Data Sync was built to be. It should be really quick and simple, where you connect to your data sources and integrate your data.
We also want to keep compatibility between the versions for as long as possible. We don't want our customers to have to re-develop their integrations every few months because our products have changed. The integrations you develop should last years. We actually have some customers still running the same integration 10 years later!
So we had a look at what we have and compared it to what we were developing. One of the reasons for the development was to bring in source control capabilities around the project step configuration, as is expected with any modern development process. We were doing this in DS4 but it was going to force our customers to radically change what they were doing and require them to upgrade.
This lead us to look at the Run Tool again. The Run Tool was a basic way to connect multiple Data Sync projects into a Run Book and could run on a schedule via the Windows Task Scheduler. It is already based on XML files, like Data Sync project files, and could easily be used with a source control system. It just doesn't have the features Ouvvi has.
Ouvvi has been our go to system for running multiple Data Sync projects and it is fantastic, but customers struggle to install it and it can be over kill for those with only a few integration tasks.
So we decided a better route, would be to bring some of the Ouvvi features to the Run Tool whist maintaining compatibility with the old Run Tool so that customers can build larger integrations without the need for Ouvvi. You can download the working preview version with the new Run Tool from the download page, and it is available from version 3.0.2000.
Some of the features we are adding are:
- Updated UX (new Step Designer)
- Drag and Drop features
- Execute Single/Multiple Steps
- Copy Step
- User Settings to pass values to the Step configuration
- View the step error in the UI
- More detailed error messages
- New Logging generates a separate XML Log file per execution
- The ability to use Command Line parameters
- Updating the .Net Framework to 4.7.2
- Migrating more step types from Ouvvi to the Run Tool such as Project Status Reporting Step
- Addition of the SuccessDataChanges Run Condition
So let's go into detail on some of these.
Right Click Options
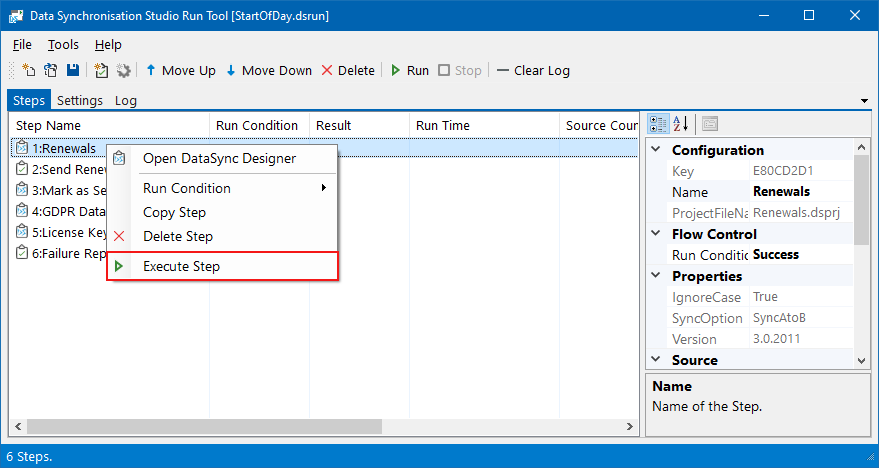
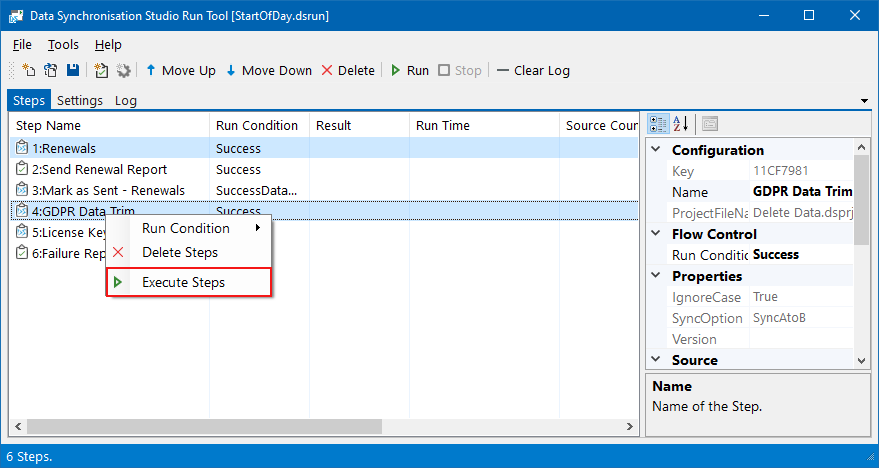
You can now right click onto a step to choose from a number of functions available. You can copy a step, execute single or multiple steps, change the run condition, delete steps, and view the exception that was thrown if the step returned an error.
Execute Single or Multiple Steps
If you need to test that a step you have created runs correctly, you can right click and select Execute Step to run the single step.
If you need to run a selection of steps from the project, just select those you need, right click and select Execute Step(s) to run them.
Change the Run Condition
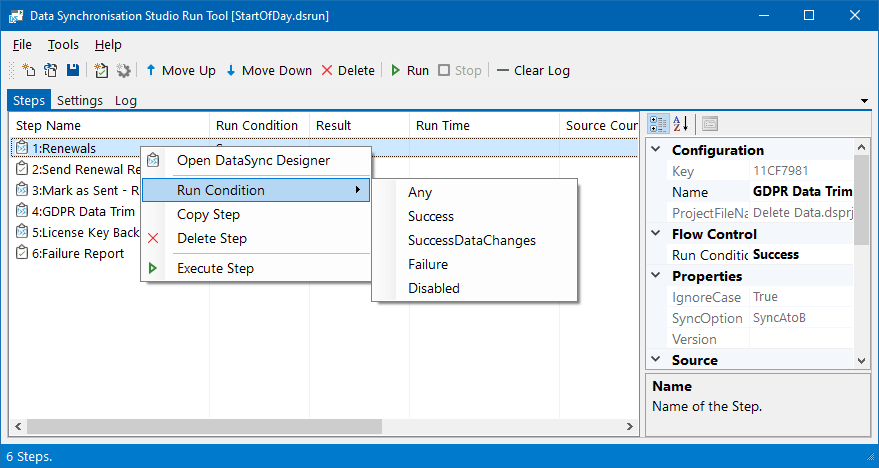
You can still change the run condition of your steps in the panel to the right of the main window, however with the right click shortcut it's just that little bit quicker and easier.
You can either select a single step or multiple steps and change the run condition in one go by clicking Run Condition and then selecting the run condition you want to change to.
This can be Any, Success, SuccessDataChanges, Failure or Disabled.
Copy Steps
Another feature that comes in handy is the ability to copy a step. Just right click, select Copy Step, rename it and click OK.
This can be particularly useful if you have a Data Sync project where only the connection needs changing. Just copy the step, double click to open and then make the changes you need.
View the Error Exception
In the past if your project failed on a step, you would need to go to the log, scroll through to find the error, and many times the error you saw didn't help you diagnose the problem.
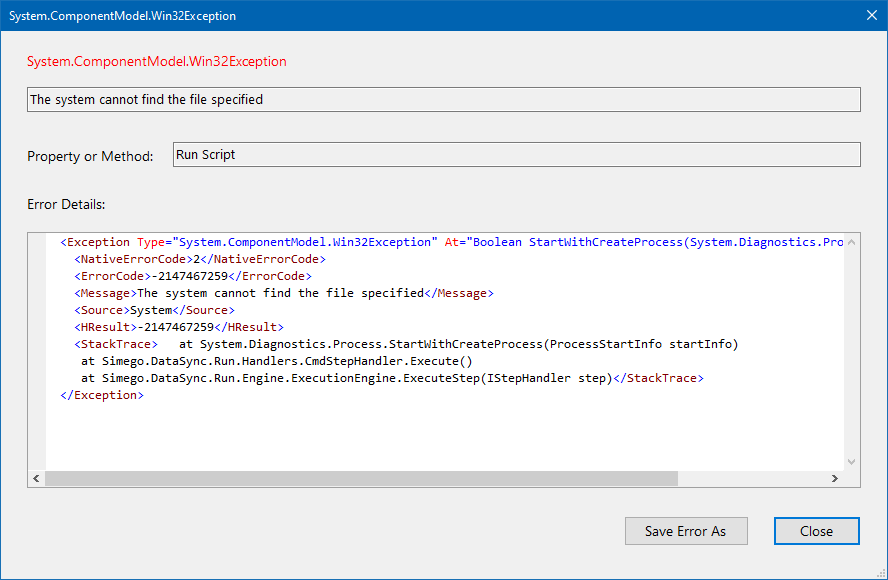
Now when a step errors you can right click and select View Error Details.
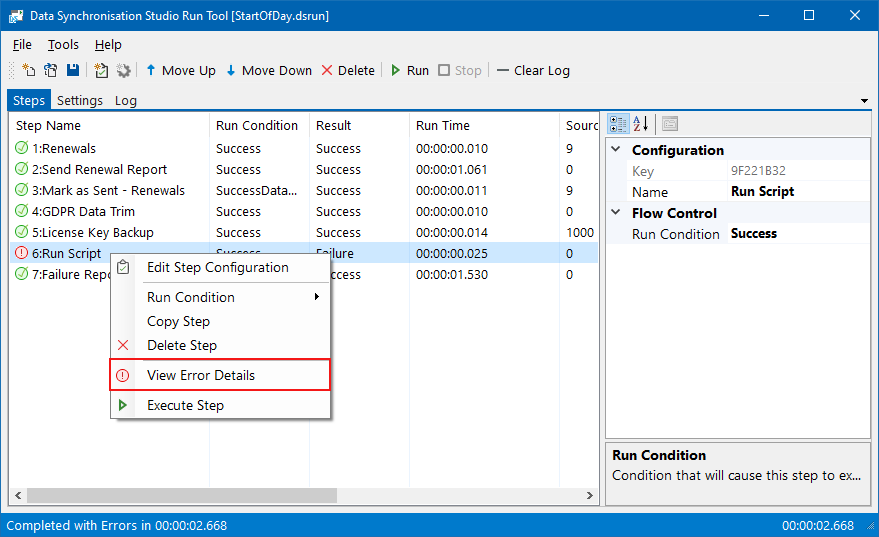
Clicking on this opens the error window and shows the exception that was thrown.
This leads us onto the improved logging of errors.
Logs
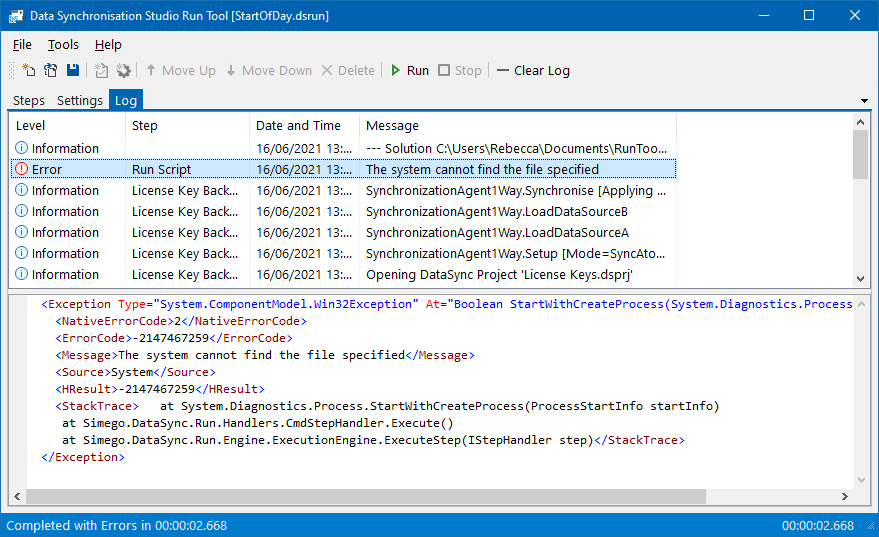
One of the main reasons we preferred using Ouvvi to the Run Tool was the level of details found in the logs. The Run Tool didn't have much detail which made it difficult to figure out what was causing the issue and how to resolve it. So we brought in the exception handling that we had already been adding to Data Sync.
Within the Run Tool itself, the logs can still be viewed within the Logs tab. These now show the full exception thrown in an output window, to help you resolve any issues.
You should find it easier to work out what the issue is.
The log files are now also stored locally within the .ds folder that is created in the same folder as your Run Tool project. Each run is stored as an XML file you can view as you need to.
Drag Drop
To make importing existing Data Sync steps and rearranging your step order, we've brought in the drag and drop functionality. Just drag your steps around until they are in the order you need, and drag any Data Sync Projects from your file explorer into the Run Tool Project.
Pass in User Settings
One of the key selling features of Ouvvi is the ability to dynamically pass in settings to your steps, so we have added this to the Run Tool.
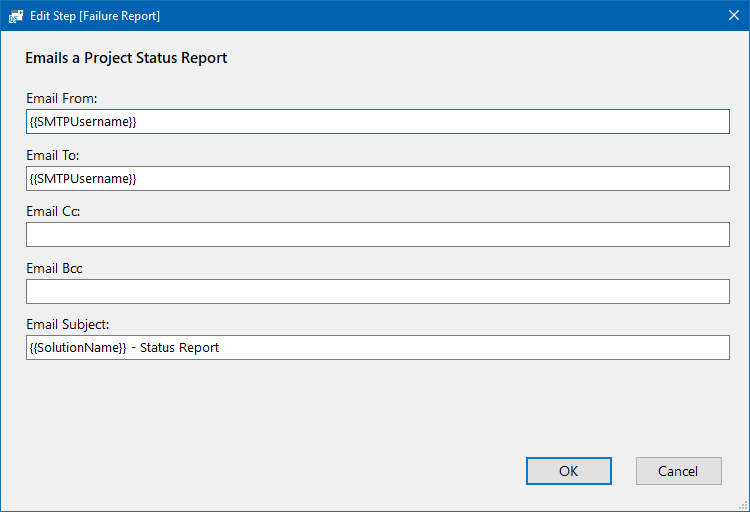
There are a number of built in settings that you can make use of, which will be listed on the documentation pages. But you can add any setting you might need. This can be a file location, a name, a time etc.
You can pass these settings into any of the steps available, as well as passing them into your Data Sync projects. Just add the setting to your project and then add the setting to a step by containing it within curly braces e.g.{{MySetting}}
If you prefer to run your Run Tool projects from the command line you can also bring in settings from command line parameters or environment variables.
Edit Steps
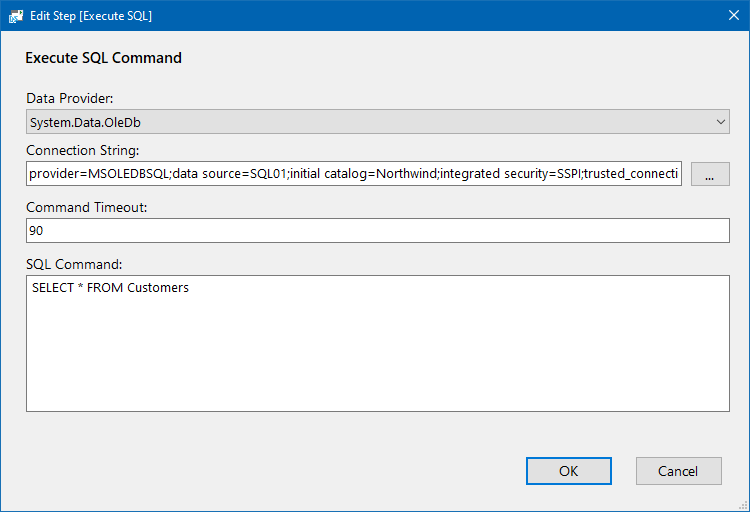
We always found creating and editing step configurations in the Run Tool a little cumbersome. The small panel to the right, wasn't the easiest to work with so we can now double click onto a step to open a window specific to that step and edit its parameters.
In this window you can configure and edit your step details as you need to. Double clicking onto a Data Sync step will open the Data Sync designer.
The panel on the right now contains basic details, for most steps, such as the name and the run condition. Data Sync steps will have some of the project configuration details shown as well.
Source Control
And finally, the Run Tool has the ability to be managed with source control. We are currently using GIT to keep track of the changes made to our test projects and will be listing the details on how to set this up in the future documentation. But you can use your preferred source control provider as you need.
By making use of source control, you ensure that you can always roll back to a version that worked if any breaking issues are introduced.
Future Features
Hopefully you are excited by the changes being made, and before we make it a full release we have a few more items to develop.
One of these is adding additional steps from Ouvvi so that you can extend your projects further. And as always we are adding to the documentation and training pages to cover the updates.
The Run Tool will still use Windows Task Scheduler to schedule the project for now, but we are looking into other options. So watch this space.
