Updating the Active Directory Manager Attribute
The Active Directory connector has built in columns that handle all the hard work when mapping to attributes that need to lookup values, these are the Data Sync columns (DS-) that will only show in Data Sync.
When updating or adding a manager attribute to a user in Active Directory you need to lookup the manager within your OU by providing the distinguished name. With the Data Sync columns you can choose to use either their Email, their Employee ID, their SAMAccountName or the Distinguished Name. Data Sync will then lookup the value in the OU you are connected to and return the DN, this is what AD requires internally when writing to the manager attribute.

The following page discusses how you would go about configuring your project to update the manager attribute in Active Directory for existing users, and then the options you have to automate and schedule your project. We cover how to add the manager attribute to new users in the Creating AD Users blog.
Requirements
Before getting started you need to ensure you have the following:
- Windows 10 or Windows Server
- Downloaded & Installed Data Synchronisation Studio
- Have a source data set containing your user and manager details
- Have access to Active Directory
If you do not have Data Synchronisation Studio you can get a free evaluation edition. To test the automation using Ouvvi please contact us to upgrade your trial key.
Connect to your Source and Active Directory
Start by opening Data Sync and connect to your source data. This can be a SQL table, excel spreadsheet or a CSV as a few examples. For this scenario we will be using a SQl table, but the process will be the same for any of our available connectors.
You then need to connect to your Active Directory users. To do this click onto Connect Datasource in the target window and go to Active Directory > Active Directory V2 - Users/Contacts/Groups/Computers.
By default Users will be selected from the DefaultAttributes drop-down menu, this is what you need so you don't need to change this. Then enter in the LDAP path to your Active Directory instance, and enter in any credentials you need to access AD.
The LDAP Path can be just your server name or the path (including the server name) to a specific OU. For example connecting with just a Server Name would look like this: LDAP://dc01, and connecting to a specific OU would look similar to: LDAP://dc01/OU=Demo,DC=lab,DC-simego,DC=com.
You can find more details on how to find your LDAP path here.
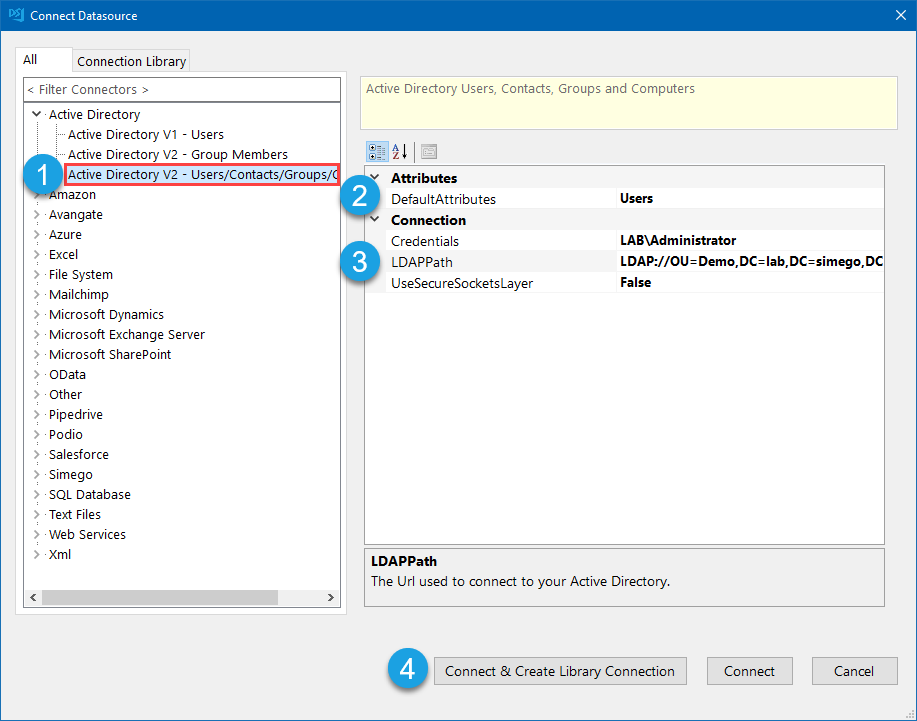
You can then click Connect & Create Library Connection to save the connection to the connection library. Just enter in a name for the connection and click OK. Then refresh the connection window and your Active Directory connection will be visible in the list.
This only needs to be done once per OU as you will be able to access other objects such as Users and Contacts from the connection window.
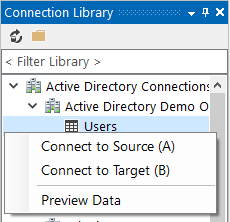
If you have already saved your connection to AD you can select the Users object from your AD connection.
Mapping
We then need to map the source columns to their corresponding attributes in AD.
For the manager attribute you need to have listed either the email address, employee ID, SAMAccount name or distinguished name of the manager in your source data.
Map this source column to the corresponding DS- column from the target window. For example we are using the manager's email address, so this is mapped to the DS-Manager-Email column. Data Sync will then do the lookup for you and return the DN of the manager when writing to AD.

Preview the Compare Results and Sync
Once the mapping is configured you can compare the source data against the target and preview the results.
In this example we can see we have 5 updates to make, and the changes to be applied to Active Directory are highlighted in yellow.
Please note deletes are disabled by default but will still show in the results if records are not present in the source but are in the target.
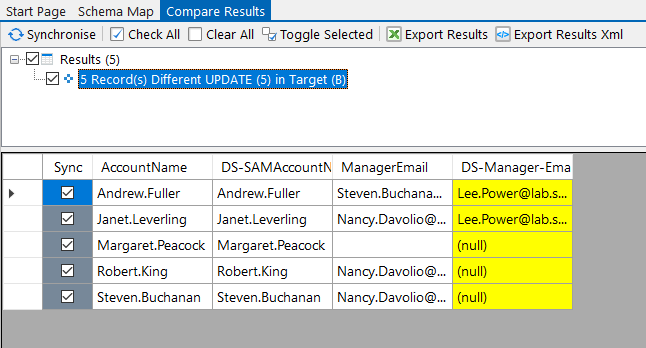
To apply these changes click onto Synchronise and then Start to begin the sync.
Your Active Directory users will now have the manager attribute updated with the value you supplied. Make sure to save your project so that you can use it again in the future.
Automate & Schedule
You may want to automate the manager update project so that it runs on a regular basis so that your Active Directory is always kept up to date. To do this you can use either the Run Tool or Ouvvi.
Ouvvi gives more options for scheduling, with both time and event based triggers. So you could configure a trigger to start your project whenever a change is detected in your SQL table or SharePoint List. Note that this requires using a modified date time stamp in your SQL table.
Alternatively you can use the run tool to schedule the project to run using Windows Task Scheduler.
Run via the Run Tool
The Run Tool is an additional program that comes linked to Data Sync and enables you to build out your data integration jobs.
You can use this to group Data Sync projects that need to run in order and add additional step types such as adding an status report to email you when the project has run and if there were any failures. Each step is run in the order it appears in the list and you can apply conditional rules so that the next step can run if the previous one succeeded or had data changes for example. To find out more please see our Run Tool Documentation.
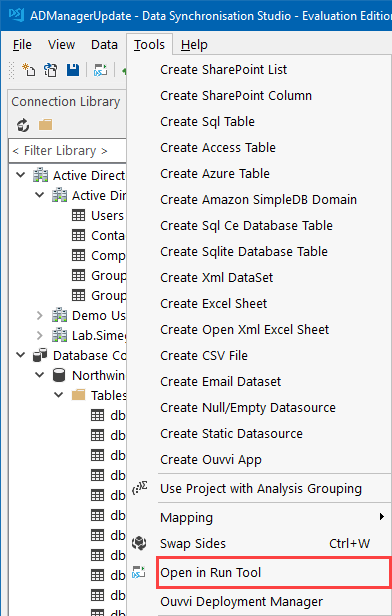
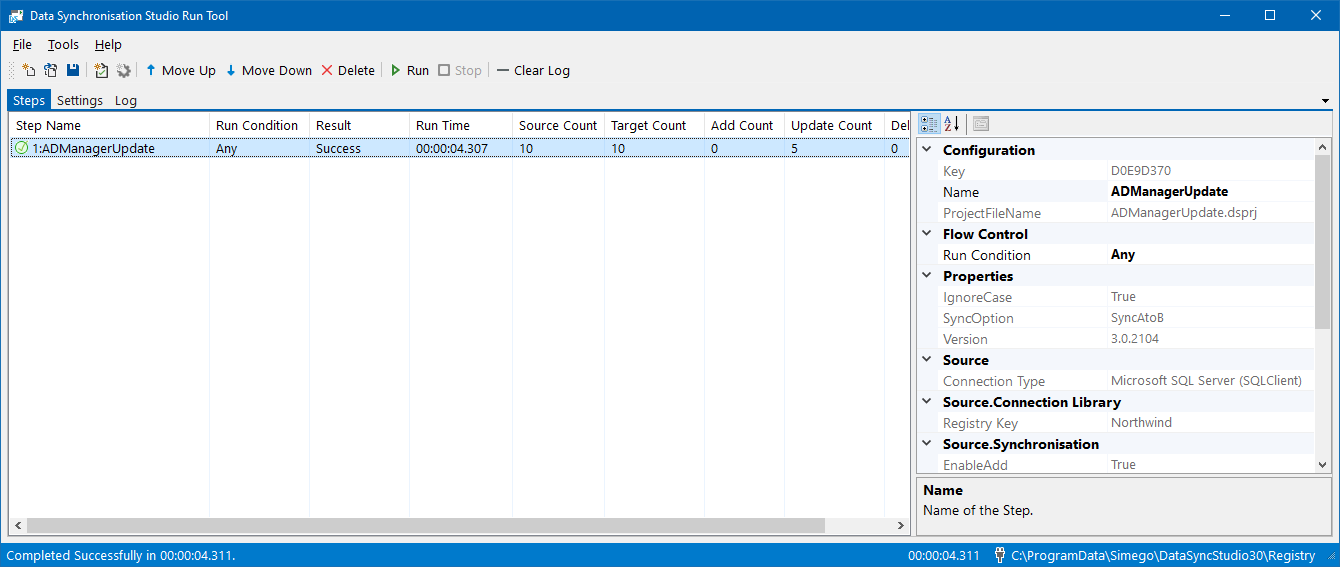
To open your project in the Run Tool, in your Data Sync project go to Tools >Open in Run Tool.
You can then click onto the green Run button to check it runs as expected. If there are data changes you will be provided with a count of how many items were added updated or deleted
Run via the Command Line
Another option is to Run the Run Tool project or single Data Sync project from the command line. To do this pass the path to the project file like this:
Run Tool Project
Data Sync Project
Automate with Windows Task Scheduler
You can then schedule your Run Tool project to run when you need it to using Windows Task Scheduler. For the full details on how to do this see our Task Scheduler Documentation.
Automate with Ouvvi
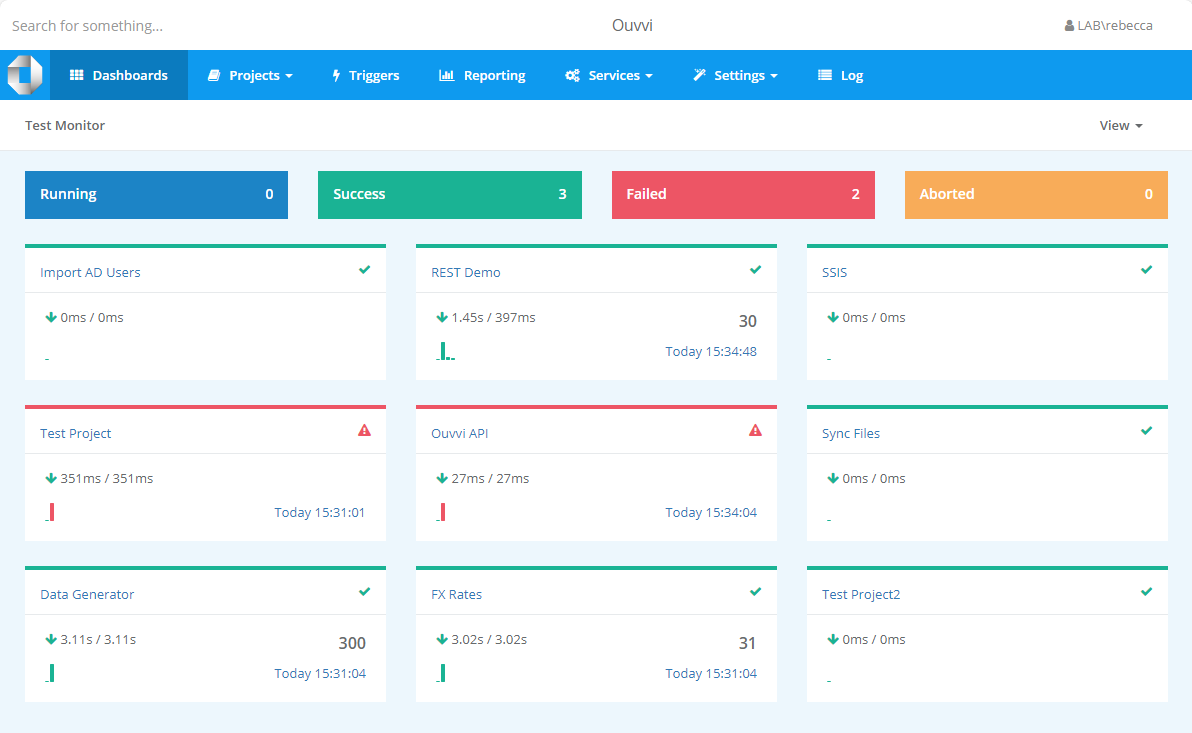
An alternative option, with more scheduling capabilities is to use Ouvvi Automation Server. Ouvvi enables you to fully schedule and manage all of your Data Integration Projects, from Data Sync projects to SQL Statements to Powershell Scripts.
It provides full logging and documentation capabilities to fully manage your integration operations.
To find out more see our Ouvvi Documentation or send us an email.
To learn about creating new Active Directory Users, setting default passwords and adding them to groups you can see our Create AD Users blog.
